Rinse the tire, dry it, and work in shade with gloves. Pick a rubber-safe tar remover (citrus or low-VOC solvent) and test a hidden spot. Spray or gel, let dwell per instructions, then soften residue with a soft brush or plastic scraper at a shallow angle. Rinse thoroughly and repeat for stubborn bits. Avoid harsh solvents or heat. Finish with a water-based tire dressing and routine washes to prevent return. Keep going for step-by-step techniques and safety tips.
Key Takeaways
- Rinse and pre-clean the tire, removing loose dirt and letting it dry before chemical application.
- Test a rubber-safe tar remover (citrus or low-VOC solvent) on a small hidden area first.
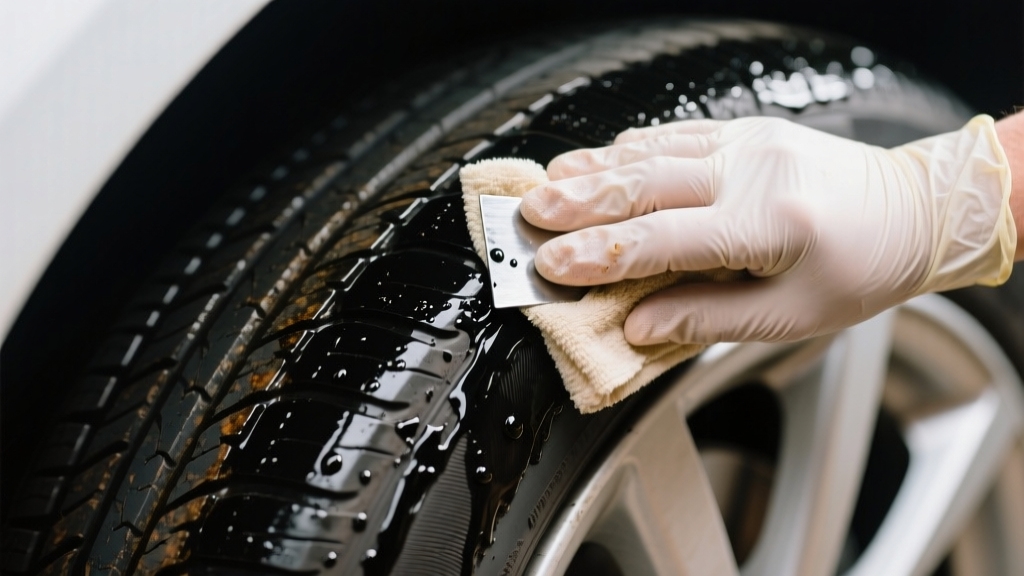
- Apply remover per instructions, let it dwell, then soften tar with a soft brush or plastic scraper.
- Use clay bar or mild detergent and circular scrubbing to lift residual tar, rinsing thoroughly afterward.
- Dry completely, inspect for damage, and apply water-based tire dressing to protect and prevent re-adhesion.
Prepare the Tire and Gather Supplies
Before you start, rinse the tire with water and use a soft brush to remove loose dirt so you can clearly see every tar spot. Inspect the surface closely, note the size and location of each deposit. Avoid working in direct sunlight or excessive heat to prevent cleaner evaporation and rubber damage.
Rinse the tire, brush away dirt, and inspect for tar—avoid direct sun to prevent cleaner evaporation and rubber damage.
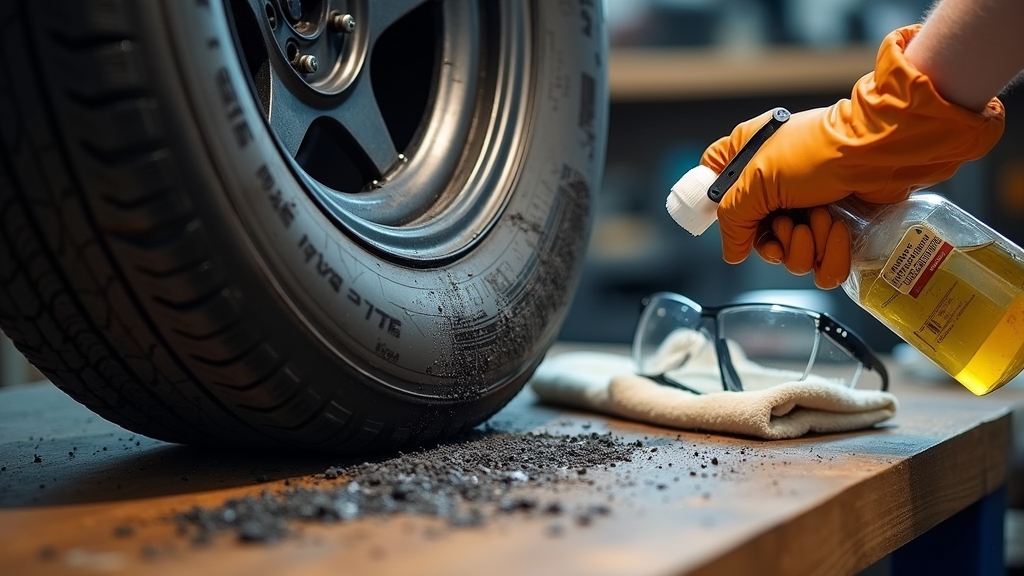
Next, set up a shaded, ventilated workspace with protective coverings and a nearby water source. Assemble warm water, a bucket, microfiber cloths, soft-bristle brushes, plastic or rubber scrapers, and tar-safe gloves. Prepare diluted cleaners like car wash soap or APC in spray bottles, mixing to the recommended ratios and labeling them.
Keep eye protection handy and avoid windy conditions. Mark affected areas for systematic treatment and have towels ready for post-rinse drying and proper waste disposal. Use a commercial tar remover on stubborn spots, applying it according to the label to avoid paint or rubber damage and to ensure effective removal. Consider using a high-efficiency filter concept like filtration efficiency when selecting cleaning tools to minimize contamination and protect materials.
Choose the Right Tar Remover for Tires
Choose a tar remover based on formulation—solvent sprays for quick breakdown, gel formulas for vertical tires, and citrus or professional-strength products when stronger action’s needed.
You’ll prioritize solvents that dissolve tar without degrading rubber, low-VOC or mild-scent options for safer use, and manufacturers’ compatibility notes to avoid harming sidewalls or tire dressings.
Test a small area first and wear gloves in a well-ventilated space to confirm safety before full application. Stoner Tarminator Tar & Sap Remover is effective for tire prep and removes mold release, oils, and mounting soap residue. Make sure to follow product instructions and consider streak-free performance when selecting a cleaner.
Product Types Overview
Picking the right tar remover starts with matching product chemistry and format to the job: solvent-based formulas dissolve heavy, oil-rich tar quickly but can be aggressive. Water-based cleaners offer a gentler, eco-friendlier option for routine degreasing.
Combination or multi-purpose cleaners handle tar plus bugs, sap, and iron deposits for broader maintenance. Specialty, pH‑neutral removers protect ceramic coatings and delicate finishes while still tackling stubborn residue. Choose solvent-based liquids or aerosols for rapid breakdown of dense deposits.
Expect higher cost and professional-grade performance. Use water-based concentrates for regular maintenance and touchless workflows. Select combo cleaners or gels when you need versatility and longer dwell time on vertical treads.
For coated wheels, pick pH-neutral formulas validated for sensitive finishes to avoid degrading protective layers. CarPro TarX is ideal for very stubborn, aged tar on tires and wheels.
Look for products formulated with low-VOC, non-chlorinated solvents to reduce environmental and material damage while maintaining cleaning power, especially around rubber components and painted surfaces, which can be sensitive to harsh chemicals like chlorinated solvents and methanol material compatibility.
Safety and Compatibility
When selecting a tar remover for tires, match product chemistry and application to the tire’s condition and mounting environment to avoid chemical damage, fires, or health risks. You should choose non-flammable, non-corrosive formulas when possible, test on a hidden area, and use personal protective equipment. Rinse thoroughly after treatment to remove residues.
- Prefer citrus or bio-based removers for general safety and low rubber impact.
- Reserve petroleum solvents or heavy oils for embedded tar; use sparingly and avoid old/cracked tires.
- Avoid abrasive tools; use soft brushes or plastic scrapers after chemical softening.
- Work outdoors or in ventilated areas, follow dwell times, and dispose of used solvents per local regulations.
Also consider that small areas of tar can often be removed with household products like detergent and elbow grease, especially when the tire surface is only lightly contaminated and the water temperature is warm detergent cleaning. Using more affordable maintenance products like cost-effective synthetic oil can help owners budget for regular tire and vehicle care.
Pre-Cleaning: Wash and Dry the Tire Surface
Start by rinsing the tire with a steady stream of water to knock loose dirt and gravel away from tar spots.
Let the surface dry completely before applying any chemical remover so products adhere and work as intended.
If the tire shows wear or cracking, avoid high-pressure rinses and rely on gentle drying with a clean cloth.
For stubborn tar, consider using a professional-grade tar and iron remover to loosen deposits before wiping, as these products are designed to melt tar deposits.
For heavy-duty garages, consider combining this with energy-efficient LED lighting to better spot remaining residue and work safely.
Rinse Loose Dirt
Before applying any tar remover, rinse the tire with a strong, even stream to knock loose dirt and gravel off the surface so cleaning products can work effectively.
You’ll use this rinse to remove abrasive particles that embed tar, reveal contamination extent, and prevent scratching during scrubbing.
Aim a hose or pressure washer evenly around the tire, working top-down until debris flows clear. Use a firm but not excessive pressure; avoid damaging sidewalls.
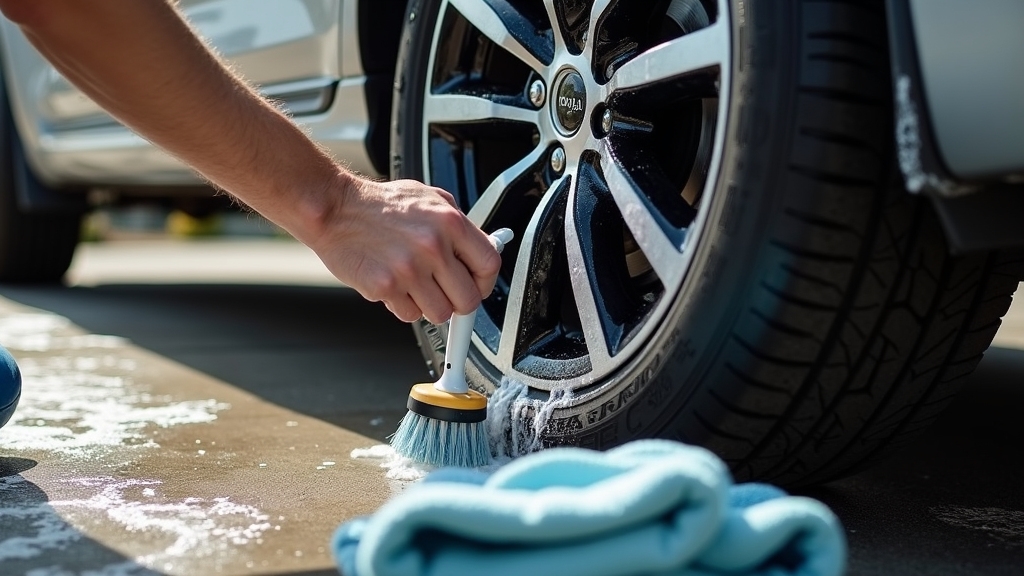
Apply mild automotive soap to wet rubber and agitate with a soft brush. Rinse thoroughly after detergent so no residue remains to interfere with tar agents.
Contain runoff and use biodegradable soap to reduce environmental impact.
After rinsing, confirm the surface is visibly free of loose material before proceeding.
Prompt removal is important because tar can soften rubber and cause long-term damage if left on the tire.
For best results, consider using a pressure washer soap that is low-foaming and compatible with pressure washers to avoid residue and equipment issues.
Dry Thoroughly Before Treatment
Although rinsing removes most grit, you’ll need to dry the tire completely so tar removers can work at full strength and you can spot residues accurately. Drying prevents dilution, stops dirt spread, and reveals tar spots in grooves and sidewalls.
Use high-absorbency microfiber or chamois, work in shade, and recheck crevices. Avoid blowers that fling debris and don’t let direct sun force rapid evaporation that degrades products. Keep towels designated for tires to prevent contamination and wear gloves to maintain grip.
Quick tar removal is important because tar bonds to paint and rubber if left too long. Regular maintenance of filtration and air intake systems can reduce particulate buildup on vehicle surfaces, making tar and grime easier to remove when cleaning air cleaner elements.
| Tool | Method | Note |
|---|---|---|
| Microfiber | Wipe in panels | Lint‑free, high absorbency |
| Chamois | Large surface drying | Gentle, efficient |
| Shade | Air dry | Controls temperature and dust |
Apply Tar Remover Safely and Effectively
Applying tar remover to tires: use rubber-safe products, gloves, shaded ventilation, follow dwell times, rinse and inspect.
When you apply a tar remover to a tire, work deliberately: choose a product labeled safe for rubber, wear gloves, and apply in a well-ventilated, shaded area to avoid rapid drying or solvent heat buildup.
Select citrus-based or WD-40–type products for gentler action; reserve stronger solvents only with caution.
Follow manufacturer dwell times, typically 1–30 minutes, and avoid plastics or decals.
Keep flames away from flammable formulations. Rinse and inspect immediately after treatment. Many heated hoses and their food-grade materials are designed to resist chemical exposure, which can inform choices about compatible products.
Use a microfiber or spray applicator for targeted coverage. Adhere strictly to dwell times and reapply as needed.
Protect surrounding trim and avoid abrasive tools. Dispose of rags or used product per local hazardous-waste rules.
If you see swelling, cracking, or discoloration, stop and switch products.
Also consider using a tar remover that is free from White Spirit to reduce the risk of damaging rubber and paint.
Physical Techniques for Stubborn Tar Spots
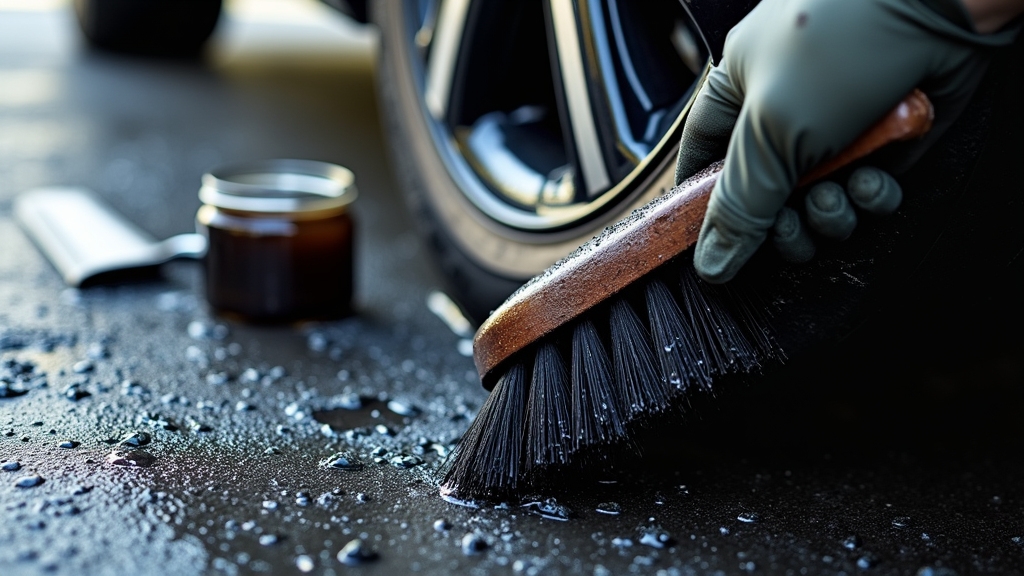
If tar remover and solvents haven’t budged stubborn spots, switch to controlled physical techniques that combine gentle abrasion, penetration, and patience to lift deposits without harming the rubber. Use plastic knives or plastic razor blades at shallow angles, working in small sections.
Apply linseed or cooking oil for 25–30 minutes to penetrate adhesive bonds, then scrape or brush. Scrub with stiff tire brushes in circular motions using detergent; apply steady pressure, not jerks.
Let ambient warmth assist—avoid direct heat. After bulk work, lubricated clay bars pick up residual particles; fold clay often and glide gently. Alternate treatments and rest periods rather than forcing removal to prevent cuts.
Inspect as you go and proceed incrementally until surface is clean. For persistent areas, monitor live data-like indicators such as real-time monitoring of progress by checking small test patches and recording results so you can adjust technique.
| Tool | Action | Tip |
|---|---|---|
| Plastic blade | Shallow scraping | Small sections |
| Stiff brush | Circular scrubbing | Use detergent |
| Oil | Penetrate tar | 25–30 min |
| Clay bar | Residual pickup | Keep lubricated |
Rinse, Inspect and Repeat if Necessary
After you’ve loosened and scraped away tar, rinse the tire thoroughly with plenty of water and a mild detergent to flush out solvent residues and softened tar particles. Use a scrub brush to work detergent into grooves and repeat rinsing until no foam or visible residue remains.
After rinsing, inspect under good light for residual tar, deep grooves, or rubber damage. If you find spots, repeat targeted cleaning cycles using linseed oil or a water‑dispersing product. Allow 20–30 minutes for soaking, then scrub and rinse again.
Focus inspection on tread grooves and sidewall junctions. Use plastic tools for any scraping after soaking. Avoid harsh solvents; they’ll degrade rubber. Regular monitoring and removal of tar and gravel improves braking. Also check that the tire and rim match the recommended weight capacity for safe riding.
Repeat cycles until no tar or cleaning residue is detectable.
Post-Removal Care and Prevention Strategies
Once you’ve removed tar, protect and maintain the tire to preserve rubber integrity and make future cleanings easier. Apply a specialized, water-based tire dressing per manufacturer instructions to restore elasticity and create a durable barrier that reduces sling. Dry tires completely before dressing to avoid trapped moisture.
Inspect regularly for fresh tar; wash promptly after driving on tarred surfaces or construction zones to prevent hardening. Install mud flaps or splash guards to limit debris adherence. Use tire-specific tar removers and soft applicators; avoid gasoline, kerosene, and abrasive tools that damage rubber.
Work in shade and ventilated areas, rotate the tire while cleaning, and test products on a small area first. Keep cleaning records, monitor tire condition, and consider periodic professional detailing. Tarminator is highly effective at removing surface contaminants, so consider keeping a bottle on hand for quick touch-ups using a versatile product.
Frequently Asked Questions
Can Tar Damage My Tire’s Structural Integrity?
Yes, tar can damage your tire’s structural integrity. Tar’s chemicals can penetrate and degrade rubber, causing brittleness, cracks, and reduced carcass strength.
Build-up also adds uneven weight, affecting balance and heat retention, which accelerates wear and may lead to blisters or blowouts.
You should remove tar promptly with mild cleaners, inspect for cracks or bulges, and use tire conditioners to restore flexibility and help prevent premature failure.
Can Tar Removers Void Tire or Wheel Warranties?
Yes — using tar removers can void tire or wheel warranties if chemicals cause damage or violate maintenance terms. You should check warranty language and avoid solvent-based products that leach rubber oils or degrade compounds.
Prefer manufacturer-approved or rubber-safe formulations, document products and procedures, and consult authorized dealers before treatment.
If damage occurs, be prepared to show evidence that no improper substances contributed to the failure to preserve coverage.
Is It Safe to Use a Pressure Washer on Tar Spots?
Yes, but cautiously. You’ll want a wide spray (about 25°) and moderate pressure so you don’t damage sidewalls, rims, or trim.
Don’t use narrow, high-pressure tips under 10° on tires.
For stubborn tar, pre-treat with an automotive tar remover and scrub with a stiff nylon brush, then rinse with the pressure washer.
Test on a small area first, wear gloves, and avoid repeated high-pressure blasting to prevent surface harm.
How Long After Removal Can I Apply Tire Dressing?
You can usually apply tire dressing once the tire is completely dry — typically 10–15 minutes after cleaning for most products.
For some dressings like Dura-Dressing, wait longer: about 12 hours at 75–90°F or 24 hours in cooler conditions to guarantee prior compounds fully cure.
Avoid direct sunlight during drying.
After application, let dressing cure per product instructions, usually 10 minutes to 1 hour, before driving.
Can Tar Removal Products Harm Nearby Plastic Trim or Sensors?
Yes, tar removers can damage plastic trim or nearby sensors if you’re careless. Some solvent-heavy products will dull, discolor or soften plastic; citrus or milder, water-rinseable formulas are safer.
Always test on a hidden area, avoid soaking, wipe or rinse promptly, and mask sensor housings. Use clingy or foam formulations and precision applicators to limit exposure. Mechanical work (clay/microfiber) needs gentle handling to prevent scratching or sensor intrusion.
Next Steps to Protect Your Tires from Tar Damage
You’ve done the careful prep, chosen the right remover, washed, treated, and rinsed — but don’t walk away yet. Inspect every inch; a stubborn glob can hide in the tread and ruin a ride.
If you see residue, repeat targeted treatment and gentle scraping until the rubber is clean. Once it’s spotless, protect the tire with a barrier product and watch for future spills. Stay alert — tar returns when you least expect it.


