To modify your camper’s slide-out, first identify its mechanism—typically electric or hydraulic—with adjustment nuts on the slide frame. Make sure power is on and tools like a socket wrench that fit your nuts, usually 7/16”.
Fully extend or retract the slide, then loosen the jam nut and turn the nylock nut to fine-tune extension or retraction. After tightening, check seals and alignment for proper contact.
Follow precise steps to avoid damage, and consider expert help if issues persist. More detailed procedures can guide you further.
Key Takeaways
- Identify the slide-out mechanism type (electric motor, cable pulley, or worm gear) before attempting adjustments.
- Ensure all power connections are secure and the RV master power is on for proper slide-out operation.
- Locate and mark adjustment nuts (nylock and jam nuts), then loosen jam nut and turn nylock nut to adjust slide alignment.
- Fully extend or retract the slide-out before adjusting, then retighten jam nut and verify even seal contact.
- Inspect and maintain seals and locks regularly, and seek professional help if motors are unresponsive or misalignment persists.
Identify the Type of Slide-Out Mechanism
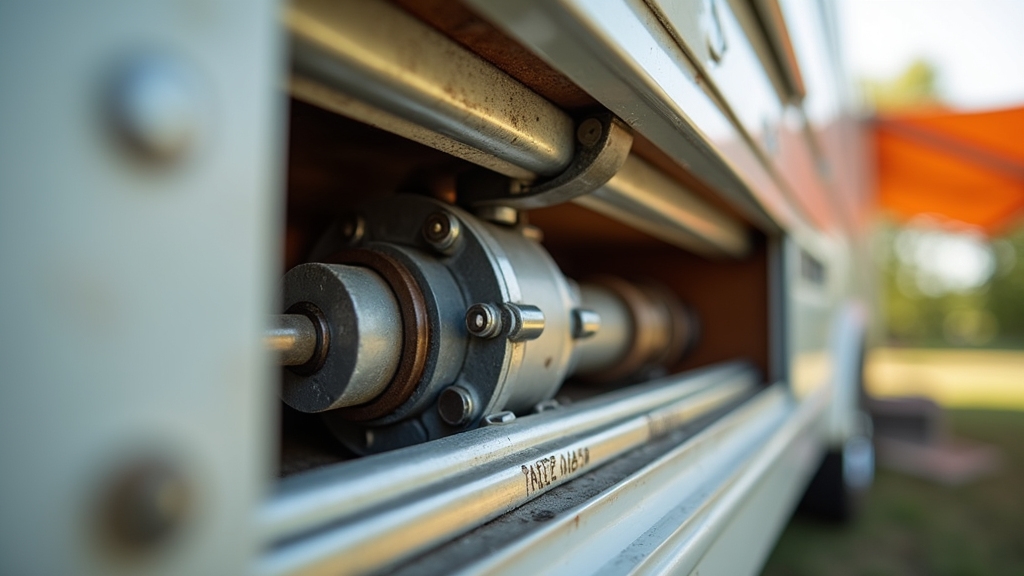
When identifying the type of slide-out mechanism in your camper, you’ll first want to examine how the slide extends and retracts.
If you see arms beneath the slide box connected to an electric motor with a worm gear, you likely have a rack and pinion system. This system is common, reliable, and designed for flush-floor slides.
The rack and pinion mechanism was the first power slide-out design, developed in 1990 by Mahlon Miller of Newmar, who tested prototypes on rough terrains. Regular maintenance of moving parts helps prevent mechanical wear that can impair operation.
Alternatively, check inside the camper wall above the slide. Cables and pulleys indicate a cable slide-out. This type is lightweight and supports heavy slides but reduces ceiling height slightly.
If the mechanism runs along the slide sides with worm gears and rails and is visible inside slide walls, you’re dealing with a Schwintek system. This system is suited for shallow slides.
Less common types include Happy Jack, which operates above the floor without worm gears or cables, and Power Gear, which may use alternative electric or hydraulic components. Electric or hydraulic systems are increasingly favored in newer models for their ease of use and reliability.
Perform Preliminary Safety and Equipment Checks
Before adjusting your camper slide-out, verify that all power connections are secure and functioning correctly to prevent electrical issues during operation. Both electronic and hydraulic slideout systems require a healthy 12V battery for proper operation.
Inspect slide-out locks to ensure they’re fully disengaged. Examine seals for any damage that could compromise weatherproofing. These checks are essential for safe and effective slide-out adjustments. Additionally, understanding the balance between performance and maintenance can help ensure your slide-out functions reliably over time.
Verify Power and Connections
How do you guarantee your camper’s slide-out operates smoothly and safely? Start by verifying power and connections meticulously to avoid malfunctions. Follow these steps:
- Ensure the RV master power switch is on and the slide-out control panel responds, confirming power supply. Proper verification of electrical connections is essential to maintain system reliability.
- Use a voltmeter to check voltage at the slide-out motor terminals and inspect wiring harnesses for secure, corrosion-free connections.
- Confirm the battery voltage meets RV standards (around 12.6 V) and terminals are clean and tight.
- For hydraulic systems, verify fluid levels with slides retracted and inspect lines for leaks or damage. Additionally, inspect the slide-out motor for any visible damage and listen for unusual noises during operation to identify potential issues early slide-out motor inspection.
Engage the parking brake before operation, as most slide-outs require it for safety. This thorough check prevents electrical and hydraulic failures during adjustment.
Inspect Locks and Seals
Why is inspecting your camper’s slide-out locks and seals critical for safe operation? Locks secure the slide firmly when retracted, preventing movement during transit. Seals maintain weatherproofing, blocking water intrusion that causes damage.
Begin by visually and tactilely examining all seals for cracks, gaps, or brittleness, both extended and retracted. Check for water stains or soft spots indicating leaks, focusing on top and bottom seals. Regular inspections like this increase the lifespan of your RV by preventing minor issues from escalating. Conducting these checks every six months helps catch early signs of wear and tear.
Test each lock manually for proper engagement, stiffness, or looseness. Lubricate lock components with appropriate lubricant. Inspect lock housings for corrosion or damage.
Clean seals regularly with mild soap and water, avoiding petroleum products. Document any wear or malfunctions and address repairs promptly.
Incorporate these checks into regular safety inspections to ensure reliable slide-out function and prevent costly damage. Consistent maintenance also helps protect against UV damage and structural degradation.
Gather Necessary Tools for Adjustment

To adjust your camper slide-out accurately, gather essential tools like socket wrenches and adjustable spanners suited for the specific nuts and bolts involved.
You’ll need screwdrivers and hex keys to access and manipulate adjustment screws and bolts precisely.
Before loosening any nuts, mark their positions to make sure you maintain alignment during reassembly. It is important to use a torque wrench to confirm proper torque specifications when tightening bolts after adjustment.
It is also helpful to consult the owner manual to identify the specific slide-out type and adjustment points before starting your work.
Essential Adjustment Tools
Before you begin adjusting your camper slide-out, gather all essential tools to guarantee the process goes smoothly and safely. Having the right equipment ensures precise adjustments, reduces damage risk, and speeds up the task.
Focus on these four key tool categories:
- Basic hand tools – screwdrivers, Allen wrenches, pliers, hammer, and measuring tape for accessing, manipulating, and measuring slide components. Choosing tools that meet OEM standards can help provide better durability and fit.
- Lubrication and cleaning supplies – RV-specific lubricants, rags, brushes, and seal cleaners to maintain smooth movement and seal integrity.
- Electrical testing equipment – multimeter, electrical tape, battery disconnect tools, and proper lighting to verify motor and switch function safely.
- Slide support tools – floor jacks, blocks, torque wrench, level, and rubber mallet for secure positioning and precise alignment.
Gather these tools before starting adjustments to work efficiently and accurately. It is also important to consult the manufacturer’s manual for specific adjustment instructions to avoid damage and ensure proper operation.
Nut and Wrench Types
Although adjusting your camper slide-out involves various components, understanding the types of nuts and wrenches you’ll encounter is essential for effective maintenance.
You’ll commonly find nylock nuts, which resist loosening via vibration, jam nuts that lock adjustments in place, and standard hex nuts securing slide components. Some systems include specialty nuts on threaded bolts for fine tuning. Using the correct quality assurance components ensures durable and reliable adjustments.
For tools, socket wrenches with matching sockets provide smooth turning, while open-end or box-end wrenches access tight spots. Ratchets speed adjustments, and adjustable wrenches add versatility but risk slipping if not secured properly. Manual override cranks may require 3/4” sockets or specialized attachments.
Always match wrench sizes to nuts precisely—commonly 7/16” for cable lock nuts—to avoid rounding or damage. Having the right nut and wrench types is critical for precise, safe slide-out adjustments. Additionally, before making any adjustments, it is important to inspect hydraulic system components and ensure they are free from leaks or damage to prevent complications during the process.
Marking Nut Positions
When adjusting your camper slide-out, marking the original positions of nuts is essential for maintaining accurate reference points throughout the process. This prevents losing track of settings and ensures you can revert if needed. Use a permanent marker or paint pen for clear visibility on metal surfaces.
Follow these steps:
- Clean the nut and surrounding area to guarantee mark adhesion.
- Draw a line spanning the nut edge and a fixed frame point to indicate rotation.
- Measure and note distances or clearances near the nut for precision.
- Photograph the marked setup for before-and-after comparison.
Before starting any adjustments, it is important to consult the owner’s manual to verify specific instructions for your slide-out mechanism. Regular maintenance and proper adjustment are crucial to ensure optimal performance and prevent mechanical issues.
These markings guide balanced adjustments, assist troubleshooting, and help maintain proper alignment and tension, ensuring smooth, safe slide-out operation.
Adjusting the Slide-Out Extension Stop
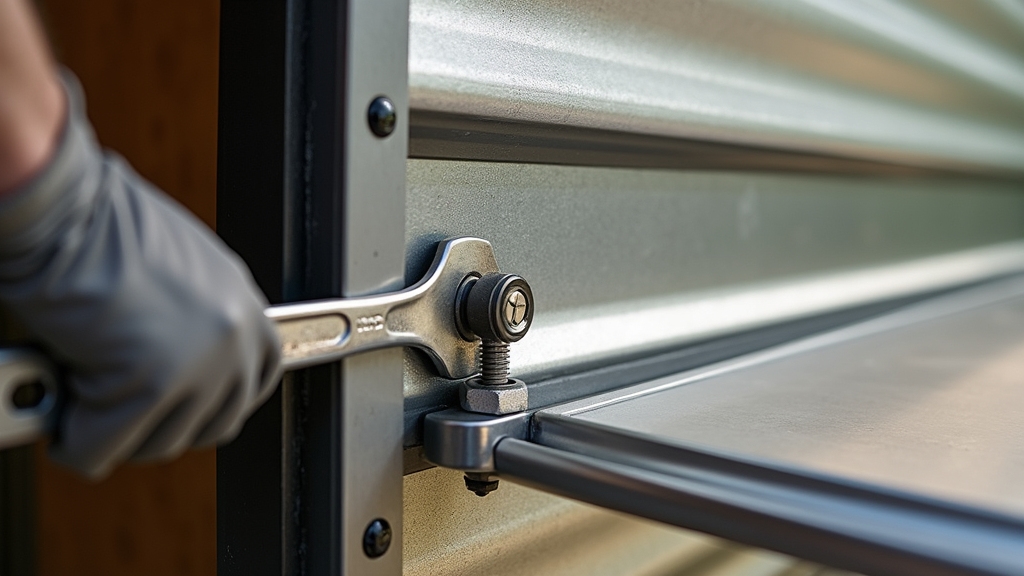
Since the slide-out extension stop guarantees how far your camper’s slide extends, adjusting it correctly assures a flush fit and prevents damage. Locate the adjustment mechanism—usually a nylock nut and jam nut on the slide-out frame, accessible from outside or underneath.
Different slide-out system types may have varying adjustment methods, so it is helpful to identify your slide system type before proceeding. Regular maintenance and inspection help prevent issues similar to how regular HVAC checks are crucial for maintaining vehicle interior systems.
Fully extend the slide using the control switch. Slightly loosen the jam nut, then turn the nylock nut: tighten to increase extension, loosen to reduce it. After adjustment, retighten the jam nut to secure the setting.
Confirm the fascia seals evenly without gaps or pressure points. Use two wrenches for adjustments, ensure your RV is leveled and stabilized, and remove any travel locks beforehand. Test multiple extend-retract cycles to verify smooth operation.
If unsure, consult an RV technician to avoid component damage. Proper adjustment and care can prevent costly repairs akin to addressing hidden residues in vehicle interiors after prolonged exposure.
Adjusting the Slide-Out Retraction Stop
Before adjusting the slide-out retraction stop, you need to identify the Nylock nut and jam nut that control how far the slide retracts. These nuts secure the stop position, ensuring the slide-out sits flush against your camper’s exterior. Follow these steps:
- Fully retract the slide-out using the control switch or manual crank.
- Loosen the jam nut with one wrench while holding it steady, then turn the Nylock nut to adjust retraction depth.
- Turn clockwise to reduce gap or counterclockwise to increase clearance for proper seal alignment.
- Retighten the jam nut firmly to lock the Nylock nut in place and prevent loosening during travel.
It is important to retract the room to the in stop and ensure the fascia seals against the outside of the unit before making adjustments to the nuts, as this confirms the correct sealing position. Outstop and Instop Adjustment
Test the slide multiple times to verify flush seating and smooth operation. Proper adjustment protects seals and prevents motor strain. Additionally, maintaining regular inspections during seasonal changes can help identify wear and ensure continued smooth functionality.
Inspect and Test Slide-Out Seals and Alignment
After adjusting the slide-out retraction stop to guarantee proper seating, inspect the slide-out seals and alignment to maintain weatherproof integrity and smooth operation.
Visually check seals for cracks, dry rot, peeling, or brittleness, and ensure adhesion is intact.
Clean seals with mild soap and water to remove dirt and debris that increase friction or cause damage.
Press seals gently to confirm flexibility and full contact against the slide and camper body, avoiding gaps or pinching.
Examine seal alignment around bulb and wiper seals, verifying the slide faces the camper squarely to prevent uneven compression.
Test seal effectiveness by listening for drafts, monitoring motor amperage for excessive draw, and conducting water spray tests for leaks. Proper seal maintenance reduces motor effort.
Address any misalignment or damaged seals promptly to preserve airtightness and smooth slide movement.
When to Seek Professional Assistance?
Whenever your camper’s slide-out exhibits mechanical, electrical, or structural problems beyond basic troubleshooting, you should seek professional assistance to guarantee safe and effective repairs. Certified technicians provide the tools and expertise necessary to diagnose and fix complex issues safely.
Consider professional help in these situations:
- Slide-out motors are unresponsive or show signs of gear pack failure.
- Persistent misalignment or damage to rails, rollers, or structural framing.
- Water leaks remain after DIY seal repairs or water damage is evident.
- Repairs require full disassembly, internal component replacement, or compliance with warranty standards.
Professionals also perform essential hydraulic system maintenance, which is critical for the reliable operation of hydraulic slide-outs.
Engaging professionals ensures reliable restoration, prevents further damage, and maintains your camper’s structural integrity and warranty coverage. Avoid risking injury or costly mistakes by trusting specialists with advanced diagnostic equipment and OEM parts.
Frequently Asked Questions
How Do Weather Conditions Affect Slide-Out Adjustments?
Weather conditions impact your slide-out adjustments by causing seals to contract or expand, affecting fit and alignment. Cold can stiffen components, making adjustments harder. Heat softens seals, increasing wear.
Moisture and debris may cause misalignment or obstruct mechanisms, requiring more frequent lubrication and cleaning. You’ll need to check and adjust alignment after storms or temperature shifts to prevent strain on motors and avoid costly repairs.
Can Slide-Outs Be Adjusted While the Camper Is on Uneven Ground?
You shouldn’t adjust slide-outs on uneven ground without first leveling or stabilizing your camper. Operating slide-outs on slopes risks misalignment, mechanical strain, and sealing issues.
If you must, engage wheel chocks and parking brakes securely, proceed with small manual adjustments, and monitor alignment continuously.
Always use stabilizer jacks after adjustment to reduce stress.
Prioritize safety and equipment integrity by working on level terrain whenever possible to avoid damage and operational problems.
What Are Common Signs That Slide-Out Seals Need Replacement?
You’ll know your slide-out seals need replacing if you notice cracks, splits, or brittleness in the rubber or plastic. Look for missing or peeling sections, discoloration, or flattening of seals that reduce compression.
Water stains, mold, or musty smells inside the camper near slide-outs also indicate seal failure.
Operationally, if the slide-out sticks, has drafts, or doesn’t close evenly, it’s time to replace those seals.
How Often Should Slide-Out Mechanisms Be Lubricated?
You should lubricate your slide-out mechanisms every 3 to 6 months, adjusting based on use. For instance, full-time RVers need monthly lubrication due to constant operation.
Before applying lubricant, fully extend the slide-out, clean debris, and use RV-specific lubricants on gears and rails.
Environmental factors like humidity or dust demand more frequent care.
Watch for grinding noises or rust. Those signs mean you must lubricate immediately to prevent damage.
Are Slide-Out Adjustments Covered Under Camper Warranty?
Yes, slide-out adjustments are often covered under your camper’s warranty, mainly if they involve mechanical, electrical, or hydraulic components. However, coverage depends on your warranty type and provider.
Structural parts like framing or weather seals usually aren’t included.
You’ll need to maintain your slide-out properly and provide proof of upkeep to keep coverage valid. Check your warranty terms carefully, as some require repairs at authorized service centers only.
Ready to Adjust Your Camper Slide Out with Confidence?
Think of your camper’s slide-out like a well-tuned door hinge. It needs precise alignment to open smoothly and seal tightly against the elements. By carefully identifying the mechanism, performing safety checks, and adjusting the stops, you guarantee it functions reliably.
Regular inspection keeps everything in sync, just like oiling a hinge. If adjustments feel beyond your comfort zone, don’t hesitate to call a professional. Proper care extends your camper’s life and keeps your adventures hassle-free.