To keep your camper water lines from freezing, insulate exposed pipes with foam sleeves or fiberglass, focusing on unheated bays and exterior walls. Apply self-regulating heat tape to vulnerable areas and use heated hoses for safe water flow. Drain tanks during extreme cold below 30°F, and install skirting to shield underbelly plumbing. Run your RV furnace to maintain interior warmth. Stick with these steps, and explore further for deeper insights into winter protection.
Key Takeaways
- Insulate exposed pipes with foam sleeves or fiberglass to protect against freezing temperatures.
- Apply self-regulating heat tape to pipes for automatic temperature control and freeze prevention.
- Use heated water hoses with internal heating systems to maintain water flow above 32°F.
- Park RV in sheltered areas or use skirting to shield underbelly plumbing from cold air.
- Winterize by draining lines and using non-toxic antifreeze to safeguard plumbing during storage.
The Risks of Frozen Water Lines
Why should you worry about frozen water lines in your camper? Your camper’s pipes are far more exposed to cold than house plumbing, with minimal insulation and often located in vulnerable exterior or underbelly areas. Sustained temperatures below 32°F for about 24 hours can freeze them, especially copper pipes, which freeze faster than plastic. Proper winterization, such as blowing out water lines, can help prevent these issues.
When frozen, you can’t access fresh water for sinks, showers, or toilets, and wastewater disposal stops as sewer hoses solidify. Additionally, the lack of internal warmth in campers means pipes are not protected from freezing temperatures as they would be in a home lack of warmth.
Worse, water expands when freezing, risking cracks or bursts in pipes, fittings, and tanks.
This can damage your water pump, faucets, and water heater, leading to costly repairs.
Burst lines may flood your RV, harming structure and promoting mold, disrupting your camping plans.
Insulating Pipes for Maximum Protection
When insulating your camper’s water lines, start by selecting the right materials like foam tubes or spray foam for high thermal resistance.
Make sure you apply pipe wraps snugly, using pre-slit foam or fiberglass strips, and secure them with tape for full coverage.
Don’t overlook protecting exposed lines—combine heat tape with insulation and cover vulnerable areas like valves and fittings to prevent freezing. For enhanced protection, consider using heated water hoses alongside insulation to ensure reliable water flow in freezing conditions.
Additionally, consider the R-value of your chosen insulation material to ensure optimal protection against cold temperatures R-value importance.
Choosing Insulation Materials
How can you guarantee your camper’s water lines stay protected from freezing temperatures? Start by selecting the right insulation material based on R-value, moisture resistance, and durability. Consider your RV’s specific needs—wet exterior lines need closed-cell foam, while dry interior areas might suit fiberglass with a vapor barrier. Insulating pipes is a critical step to protect the fresh water tank, which is often the most vulnerable to freezing fresh water tank.
Here’s a quick guide to help you choose:
| Material | Key Benefit |
|---|---|
| Fiberglass | High R-value (3.5-4/inch) |
| Rigid Foam Boards | Durable, moisture-resistant |
| Spray Foam | Highest R-value (6-7/inch) |
| Foam Sleeves | Easy install, affordable |
Pick materials like spray foam for superior insulation or polyethylene sleeves for simplicity. Match the material’s properties to your camper’s exposure risks, ensuring long-term protection against the cold. For added security, consider using a 50/50 mixture of antifreeze and water to further lower the freezing point of your water lines.
Applying Pipe Wraps
After selecting the right insulation materials for your camper’s water lines, it’s time to focus on the hands-on process of applying pipe wraps for maximum protection.
Start by cleaning the pipes thoroughly, using isopropyl alcohol if recommended. For thorough cleaning, consider using a vinegar solution as an alternative method to ensure the pipes are sanitized.
Apply thermostatically controlled heat tape along the pipe length, following manufacturer guidelines for placement—either straight or spiraled—and secure it with electrical tape at specified intervals.
Don’t cross the tape over itself to avoid fire hazards.
Focus on vulnerable areas like junctions or T-sections to prevent freezing in extreme cold vulnerable areas like junctions.
Next, cover the heat tape with pre-slit foam insulation tubes, ensuring you don’t compress them too tightly.
Secure the foam with tape every foot, leaving the thermostat exposed to ambient air.
Finally, add a waterproof wrap or foil tape for durability against the elements.
Protecting Exposed Lines
Why risk frozen pipes when you can safeguard your camper’s exposed water lines with proper insulation? Start by identifying lines in unheated bays or near exterior walls. Wrap them with foam sleeves or fiberglass, ensuring snug fits. Seal gaps at fittings and wall penetrations with expanding foam or caulk rope. For exterior hoses, use pre-slit foam insulation, securing it with duct tape, and cover connections with insulated faucet covers. Additionally, consider applying heat tape to vulnerable pipes for added freeze protection during brutal winter conditions. Combining pipe insulation with a breathable cover can further shield your RV from moisture and harsh weather elements.
Check this table for quick material choices:
| Area | Recommended Material | Key Benefit |
|---|---|---|
| Exposed Pipes | Foam Sleeves (Polyethylene) | Easy to install, snug fit |
| Underbelly | Rigid Foam Boards (Polyiso) | High R-value, durable |
| Hose Connections | Insulated Faucet Covers | Protects against extreme cold |
Applying Heat to Prevent Freezing
Dive into protecting your camper’s water lines by applying heat, a reliable method to prevent freezing in cold weather. Additionally, for added warmth in your RV, incorporate a portable space heater to help maintain even temperatures around sensitive areas.
Start with heat tape; wrap this flexible, electrically heated wire around pipes or run it lengthwise, securing it with electrical tape every 12-18 inches. Opt for self-regulating types for automatic temperature control.
Next, attach heated tank pads to the bottom of water tanks near drain outlets, ensuring a clean surface with isopropyl alcohol before sticking them on.
Run your RV furnace to warm underbelly compartments, keeping propane levels high for sustained use.
For interior pipes, use small electric heaters inside cabinets, opening doors for air circulation. Consider using a heat tape with a built-in thermostat to prevent freezing automatically.
Always verify your power supply can handle the load.
Managing Water Hoses in Cold Weather
When managing your camper water hoses in cold weather, consider investing in a heated hose to maintain water flow without freezing risks.
Make sure you’re also insulating the hose connections with foam covers or tape to block out cold air and moisture at critical points.
Additionally, disconnect the hose when temperatures drop below 30°F to prevent potential freezing and damage to your water system disconnect when below 30°F.
These steps can greatly reduce the chance of damage and keep your system operational even in low temperatures, while regular inspections of other RV components can ensure overall winter readiness.
Heated Hose Benefits
A heated hose offers a reliable solution for managing water hoses in cold weather, ensuring your camper’s water lines stay operational even in freezing temperatures.
With an internal heating system and self-regulating heat trace wire, it keeps water above 32°F, preventing ice blockages.
You’ll need to plug it into a 120VAC power source, often using a GFCI-protected outlet for safety.
This setup guarantees a continuous water supply for cooking and cleaning, saving you from hauling water in the cold.
The hose stays flexible, kink-resistant, and easy to coil, even at low temps like -20°F or colder.
Made with NSF/ANSI 61 certified materials, it’s safe for drinking water, while durable fittings resist corrosion, protecting your investment.
Additionally, this innovative solution ensures consistent water flow by preventing burst hoses caused by ice expansion burst hoses prevention.
Insulating Hose Connections
Moving beyond the benefits of a heated hose, let’s focus on insulating hose connections to safeguard your camper’s water system in freezing conditions. To complement this, consider using a durable RV cover to shield your entire camper from winter weather.
Start by wrapping spigots and hydrants with foam pipe insulation (1.5” ID for larger ones), securing it with duct tape or cable ties.
Add foam faucet covers over these connections at both the spigot and RV inlet for extra protection.
For hoses, use preformed foam tubes (3/4” or 1” ID), ensuring full coverage, and tape seams with duct tape, positioning them downward to avoid moisture.
Enhance weatherproofing by wrapping the assembly with foil pipe insulation tape, overlapping by 1/2 inch. Consider integrating a heating element within the hose insulation to provide additional warmth during extreme cold.
Finally, check hose washers and use a pressure regulator to maintain a tight seal.
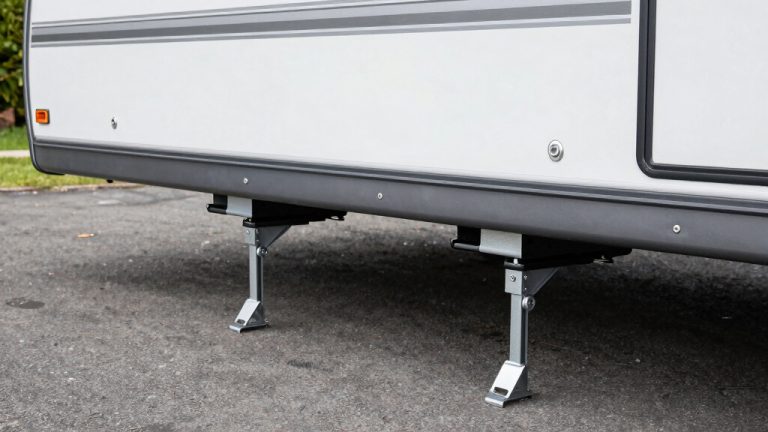
Using Skirting to Shield Underbelly Plumbing
Protecting your RV’s underbelly plumbing from freezing starts with installing skirting, a practical barrier that shields against harsh cold air and wind. By enclosing the underbelly, you’re creating a contained space that traps heat and prevents pipes and tanks from freezing below 32°F. Skirting also boosts energy efficiency, reducing your furnace workload. Additionally, it helps safeguard your water lines and holding tanks from potential damage during low temperatures from freezing conditions.
Choose the right material and secure it tightly for an airtight seal. Here’s a quick comparison of options:
| Material | Key Features |
|---|---|
| Vinyl | Durable, weather-resistant, custom-fit |
| Rigid Foam Board | Lightweight, good insulator, inexpensive |
| Inflatable (AirSkirts) | Easy setup, compact storage, expensive |
Measure carefully, attach using snaps or stakes, and seal gaps. Add a safe heat source to enhance protection in extreme cold.
Winterizing With Safe Antifreeze Solutions
While skirting offers a solid defense against freezing, winterizing your RV’s water lines with safe antifreeze solutions provides essential protection for the plumbing system. This formulation employs Hybrid Organic Acid Technology to ensure long-lasting corrosion protection.
Skirting helps shield against freezing, but winterizing your RV’s water lines with safe antifreeze is crucial for protecting the plumbing system.
Start by selecting non-toxic RV/Marine antifreeze, typically pink, and propylene glycol-based, avoiding toxic automotive versions.
Drain your freshwater tank and lines completely, open all faucets, and bypass the water heater.
Use a pump converter kit to draw antifreeze from a container into the system.
Circulate it by opening each faucet, starting closest to the pump, until pink fluid appears in both hot and cold lines.
Flush the toilet and treat drains with a cup of antifreeze to protect P-traps.
Ensure you use enough antifreeze, as larger units may require up to 6 gallons depending on size.
When de-winterizing, flush thoroughly and sanitize the system before use.
Maintaining Interior Warmth for Pipe Safety
Beyond winterizing with antifreeze, you’ve got to focus on keeping your camper’s interior warm to safeguard the plumbing system from freezing. Additionally, perform regular inspections every few months to detect any external damage that could lead to moisture issues affecting your pipes.
Start by running your RV furnace, ensuring a steady propane supply and clear ductwork, including vents to underbelly bays.
Supplement with electric space heaters under 1500 watts if shore power’s available, prioritizing safety features like tip-over shutoff.
Insulate windows with Reflectix or thermal curtains, seal door and slide-out leaks with weatherstripping, and add rugs for floor warmth.
Open cabinet doors near pipes and use small fans to circulate heat. Consider using heated holding tank pads to provide extra protection against freezing heated tank pads.
Install remote temperature sensors in vulnerable spots like wet bays for real-time monitoring.
Finally, add RV skirting to trap air and reduce underbelly heat loss.
Draining Systems for Long-Term Storage
As you prepare your camper for long-term storage, draining the water systems is a critical step to prevent freezing and damage during cold months. Start by disconnecting external water sources, turning off the water heater and pump, and bypassing filters. Empty all tanks—fresh, gray, and black—at proper facilities, ensuring they’re completely dry.
Next, drain the water heater using the pressure relief valve and low-point drains for lines. Open all faucets to release residual water. For thorough clearing, use compressed air at 45-50 PSI via a blowout plug. Check your RV manual for specifics. Additionally, ensure you open petcocks to remove pipe water completely before proceeding to the next steps. Review key steps below:
| Task | Location | Tool Needed |
|---|---|---|
| Drain Freshwater Tank | Under RV | Drain Valve |
| Drain Water Heater | Bottom Exterior | 1-1/16″ Wrench |
| Clear Lines | Low-Point Drains | None/Compressed Air |
Sealing Gaps to Block Cold Air Intrusion
Protecting your camper from cold air intrusion starts with sealing gaps that allow drafts to sneak in and threaten your water lines.
Safeguarding your camper from cold air begins with sealing gaps to stop drafts that can endanger your water lines.
Start by inspecting windows, doors, and slide-out seals for wear or cracks.
Check weather stripping on access panels and look for holes around exterior fixtures like lights and outlets.
Use RV-specific caulk to seal seams, butyl tape for windows, and low-expansion spray foam for plumbing penetrations.
Apply weather sealing tape or new stripping to block drafts.
Insulate roof vents with cushions or foam board, and cover windows with plastic film or reflective foil.
For the underbelly, install skirting using vinyl or foam board to prevent cold wind from circulating underneath.
Regularly maintain exterior sealants to guarantee a tight barrier.
Additionally, using heavy drapes inside can separate spaces effectively and help retain warmth against cold drafts.
Monitoring Tanks and Appliances in Low Temperatures
How can you guarantee your camper’s tanks and appliances stay safe in freezing temperatures?
Start by installing tank heaters or pads, ensuring they’re only active when liquids are present and temperatures drop to 41-45°F (5-7°C).
Monitor tank levels closely—keep them full to leverage thermal mass against freezing, using a tank level monitor for accuracy.
Next, protect appliances and water pumps by deploying remote temperature sensors in critical areas like fridge, freezer, and pump compartments.
Use cellular or WiFi-based systems for real-time alerts via text or email.
Set custom thresholds on smartphone apps to catch issues early.
If your RV ducts heat to pump areas, verify it’s working, or add low-amperage fans to circulate warm air effectively.
Additionally, consider insulating your tanks with appropriate materials to create a thermal barrier against cold air infiltration.
Frequently Asked Questions
How Do I Choose the Right Insulation Material?
When choosing the right insulation material, you’ve gotta consider key factors like R-value, moisture resistance, and durability.
Check the climate you’re in and pick a material with a high R-value, like spray foam (R-6 to R-7/inch).
Make sure it’s moisture-resistant to avoid mold—rigid foam boards work well.
Don’t skimp on thickness for better thermal resistance, and prioritize fire-resistant options like polyiso.
Match the material to your specific needs!
Can I Use Household Antifreeze in My RV?
Hey, you’re wondering if you can use household antifreeze in your RV.
Don’t do it.
Household antifreeze, often ethylene glycol-based, is highly toxic and unsuitable for RV plumbing.
It’ll contaminate your fresh water system, harm plastic and rubber components, and pose serious health risks to you and pets.
Stick to RV-specific antifreeze, like propylene glycol-based options, designed for potable systems.
Always prioritize safety and compatibility in your choice.
What’S the Best Heated Hose Brand?
Hey, harness the hardy help of heated hoses with top-tier tech!
When picking the best brand, you’ve gotta consider NoFreezeWaterHose for its rugged reliability in brutal -30°F cold.
It’s built tough with self-regulating heat and waterproof insulation.
If you’re after affordability, grab Camco—trusted, NSF-61 certified for safe drinking water, and protective down to -40°F.
Match their precise temp ratings and durable designs to your specific camping needs!
How Often Should I Check Insulation?
Hey, let’s talk about how often you should check insulation.
Inspect it at least twice a year if you’re a seasonal RVer—start and end of your trips.
If you’re full-time, bump that up to 3-4 times yearly, hitting each quarter.
Don’t skip pre-winter and post-storage checks either.
After severe weather, give it a quick once-over.
Regular checks catch issues early, saving you from costly repairs.
Are There Portable Heating Options for RVS?
Imagine a world of endless warmth at your fingertips, a veritable fortress of heat in your RV!
You’ve got plenty of portable heating options to conquer the cold.
Choose electric heaters—ceramic or infrared—for shore power setups.
Opt for propane models like Mr. Heater Buddy for off-grid adventures.
Don’t forget safety; make sure tip-over shut-off and overheat protection.
Place ‘em on flat surfaces, maintaining a 3-foot clearance from combustibles.
Stay toasty!
Winter Woes? Not for Your Well-Prepped Water Lines
You’ve got to guard your camper’s water lines with grit and gusto! Securely seal sneaky gaps, insulate with intense care, and heat hoses heroically to halt freezing. Skirt the underbelly staunchly, sustain steady interior warmth, and drain diligently for dormant days. Monitor tanks meticulously, tackling tiny troubles before they turn tough. With precise, practical precautions, you’ll protect your pipes perfectly, ensuring safe, sound systems through the chilliest, most challenging winter weather.