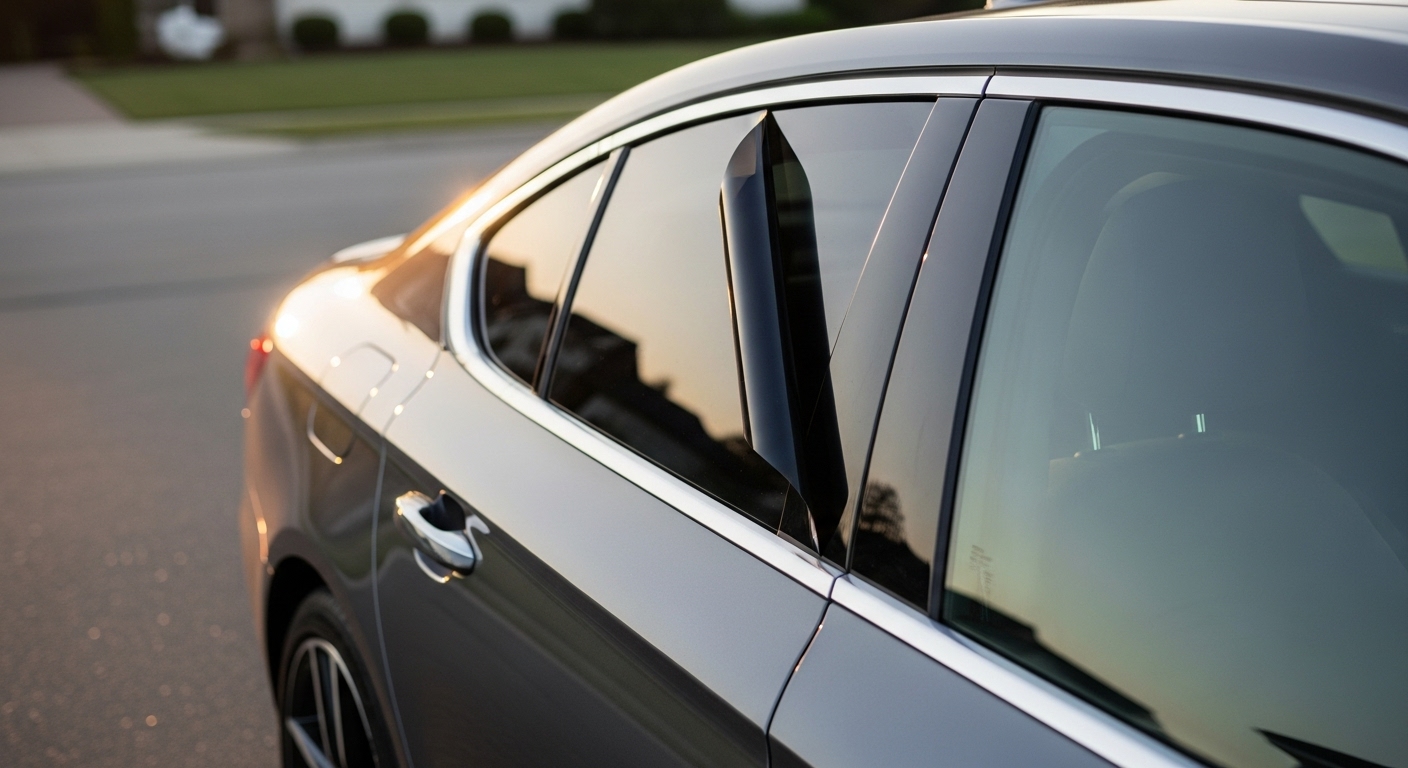
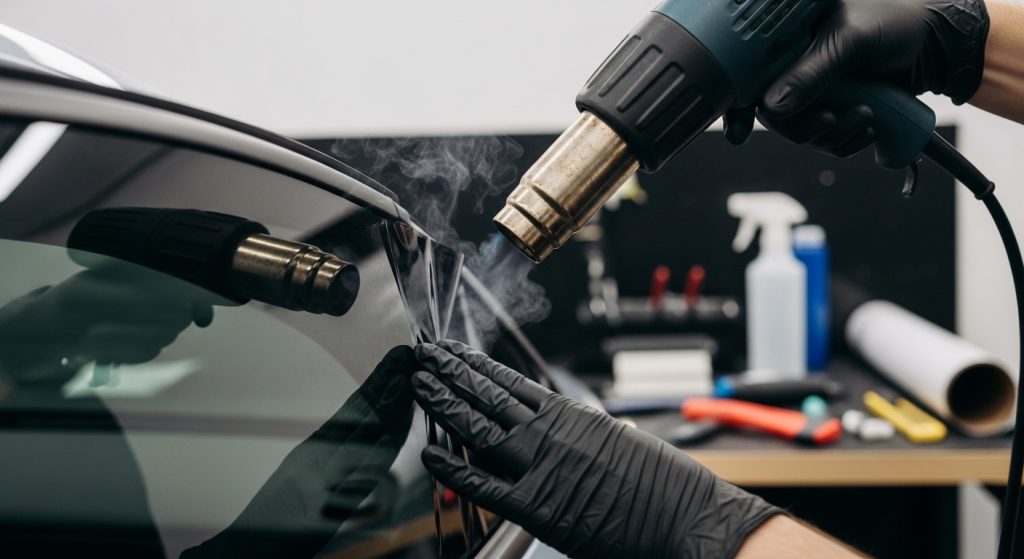
To remove window tint from your car, start by heating the film with a heat gun or steamer to soften the adhesive for easy peeling.
Use single-edge razor blades or plastic scrapers to lift the tinted film carefully, avoiding glass damage.
For stubborn residue, apply an adhesive remover or ammonia solution, then gently scrape off leftover glue.
Always wear safety gear and work evenly to prevent glass warping.
Understanding proper techniques will help you handle tricky spots and achieve a clean finish.
Key Takeaways
- Use a heat gun or steamer to soften the tint adhesive before carefully peeling off the film to avoid tearing.
- Employ a single-edge razor blade or plastic scraper to lift loosened film without scratching the glass surface.
- Apply commercial adhesive remover or ammonia solution on residue, letting it sit briefly to dissolve before gentle scrubbing.
- Wear safety gear and work in a well-ventilated area to protect against chemical fumes and heat exposure.
- Clean the glass thoroughly post-removal with glass cleaner and microfiber cloth to eliminate streaks and prepare for re-tinting.
Tools and Supplies Needed for Tint Removal
To get started with removing window tint from your car, you’ll need a specific set of tools and supplies tailored for effective adhesion breakdown and film extraction.
Essential hand tools include fresh 1–1.5″ single-edge razor blades for controlled scraping, plastic scrapers to lift film without scratching, and squeegee cards to remove softened adhesive. Using plastic razor blades can help prevent damage to glass and surrounding surfaces during scraping tasks.
Precision knives help trim edges, while utility razor holders improve control and safety.
Heat tools like variable-temp heat guns and handheld steam cleaners soften adhesive without damaging glass; use hair dryers for delicate areas. Using a heat gun at a moderate temperature setting between 200–300°F is recommended for best results in softening the adhesive efficiently.
Chemical agents such as commercial adhesive removers, isopropyl alcohol, and vinegar assist residue removal.
Equip yourself with safety gear, including chemical-resistant gloves, safety glasses, respirators, and heat-resistant pads, to protect against solvents, heat, and debris during the process.
Methods for Removing Window Tint

Once you’ve gathered the right tools and safety gear, choosing the appropriate method for removing window tint becomes the next step.
Heat-based methods like heat guns and steamers soften adhesive for peeling, with heat guns removing tint in under 3 minutes and leaving minimal residue. It is important to maintain a safe distance and moderate heat settings to avoid glass cracking during the heating process, ensuring glass integrity.
Chemical methods use ammonia or vinegar solutions to dissolve adhesive, especially effective in sunny conditions. These solutions can be enhanced by covering the exterior with a plastic bag to trap heat and increase the adhesive’s solubility. Always ensure proper ventilation when using chemical solutions to avoid inhaling harmful fumes, which is critical for safe handling.
Scraping with razor blades or plastic scrapers helps lift loosened film and residue, often combined with heat or soapy water to prevent glass damage. Plastic scrapers are recommended over metal tools to avoid scratching the glass surface.
| Method | Key Features |
|---|---|
| Heat-Based | Fast removal, minimal residue |
| Chemical-Based | Dissolves adhesive, needs warm sun |
| Steaming | Chemical-free, softens adhesive |
| Scraping | Lifts film, prevents glass damage |
Handling Difficult Tint Removal Situations
Although removing window tint is often straightforward, you’ll encounter challenges with stubborn adhesive, fragile film, or sensitive electronic components.
For tenacious adhesive, apply automotive-grade solvent after controlled heat to enhance penetration, repeating cycles rather than aggressive scraping. Repeated heating and the application of aneffective adhesive remover are often necessary for aged, stubborn tint. Always ensure the surface is thoroughly cleaned and dried afterward to avoid residue buildup and maintain clarity.
Use plastic scrapers to avoid damaging defroster lines or antenna traces, applying heat cautiously in short bursts to protect electronics. Employing gentle cleaning techniques during this process helps prevent additional damage to delicate components.
When film tears into fragments, initiate peeling at a heated corner using steady tension and wide pull-strips. Consider sectioned removal for brittle areas.
If internal obstructions interfere, carefully cut film into strips with a fresh blade.
When adhesive bonds over circuitry, consult a professional.
These precise methods minimize damage risk and improve removal efficiency in difficult tint situations.
Risks and How to Avoid Common Mistakes
When removing window tint, you must carefully manage risks to prevent damage to your glass, defroster, and antenna systems. Proper surface preparation and removal techniques help maintain the integrity of the window during the process.
Use new razor blades or plastic scrapers with gentle pressure to avoid scratches or chips.
Apply heat gradually with a heat gun or hairdryer to soften adhesive, preventing glass cracking or interior warping. It is important to use even heating in circular motions to avoid overheating any single area.
Avoid forcing unsoftened film to prevent peeling the glass surface.
Be cautious near defroster lines and embedded antennae; scraping can sever these, causing permanent malfunction.
Work in a well-ventilated area to minimize inhalation of ammonia-based fumes and wear gloves, eye protection, and masks to reduce chemical and injury hazards.
Methodically peel tint from corners, avoiding tearing brittle film to limit adhesive residue buildup and simplify removal. Inspect the window thoroughly afterward to identify any residual adhesive that may compromise the seal integrity.
Cleanup and Post-Removal Care

After carefully peeling off the window tint, you’ll need to focus on removing any adhesive residue to restore a clean, clear surface.
Spray an ammonia-based cleaner or adhesive remover evenly, then let it sit for 1-2 minutes to dissolve the glue.
Gently scrub with a soft cloth or plastic scraper; use a razor blade at a low angle for softened residue but avoid defroster lines on rear windows. It is important to work in a well-ventilated area when using ammonia or chemical removers to ensure safety. Proper ventilation also helps reduce exposure to fumes that can affect battery performance when working in enclosed spaces.
For stubborn areas, apply the solution multiple times with a scrub pad.
Next, wipe the surface with a microfiber cloth and apply glass cleaner to eliminate streaks and smudges.
Use warm water with dish soap followed by a squeegee and microfiber towel to achieve a professional shine.
Finally, inspect the glass thoroughly before considering the job complete or applying new tint.
Frequently Asked Questions
Can Window Tint Removal Damage My Car’s Paint or Interior?
Yes, window tint removal can damage your car’s paint or interior if done improperly.
Using harsh chemicals or excessive scraping risks harming paint surfaces or upholstery.
Strong solvents may cause discoloration or weaken fabrics, while sharp tools can scratch trim or dashboard components.
To avoid damage, you should use appropriate, gentle removal techniques and protect interior areas from chemical exposure.
Professional services minimize such risks through controlled, precise methods.
How Long Should I Wait Before Applying New Tint After Removal?
You’d think slapping on new tint right after removal saves time, but you actually need to wait 48 hours at minimum.
This lets adhesive residues fully dry and prevents bubbling or peeling.
In humid or cold conditions, extend the wait to 5-7 days to guarantee proper curing.
Precision matters; rushing risks ruining your investment, so follow professional guidelines carefully for a flawless, lasting finish.
Is It Legal to Remove Window Tint Myself in All States?
Yes, you can legally remove window tint yourself in all states, as no laws prohibit vehicle owners from doing so.
The focus of regulations is on achieving compliant Visible Light Transmission (VLT) levels after removal rather than who performs the task.
You’re responsible for ensuring your tint meets state standards, especially before vehicle sales or inspections.
DIY removal aligns with owner responsibility and is common unless professional services are specifically mandated, which is rare.
Can Tinted Windows Affect Car Resale Value?
Tinted windows act like a shield, preserving your car’s interior from sun damage and signaling careful ownership.
They can boost resale value by up to $1,000, especially with flawless, legal installation.
However, poorly applied or overly dark tints can diminish value, triggering safety concerns and buyer hesitation.
Your car’s regional market and tint quality fundamentally determine if this feature elevates or undermines its perceived worth during resale.
What Should I Do if Adhesive Residue Causes Skin Irritation?
If adhesive residue irritates your skin, first remove any remaining tape gently to prevent further damage.
Clean the area with mild soap and lukewarm water, then apply a cold compress for 10–15 minutes to reduce inflammation.
Use a thin layer of 1% hydrocortisone cream up to four times daily for itching.
Avoid harsh solvents; instead, try oil-based removers.
Seek medical help if blisters, spreading redness, or severe pain develop.
Restore Your Car’s Crystal-Clear Windows
Removing window tint is like peeling away the fog on a glass, revealing clarity beneath.
With the right tools and careful methods, you’ll strip away the old layer without scratching the surface.
Remember, patience is your ally; rushing risks damage, much like forcing a stubborn lock.
By following precise steps and handling challenges methodically, you’ll restore your windows to pristine condition, ensuring your car’s clarity shines through every drive.