To clean your RV water lines, first turn off pumps and drain the tank fully.
Measure 1/4 cup unscented bleach per 15 gallons, dilute in water, and add the solution to the tank.
Fill the tank, run the pump, and open all faucets until bleach odor appears.
Let it sit 4–12 hours, then thoroughly flush until chlorine smell disappears.
Regular maintenance prevents contamination and system damage.
For detailed steps and tips, you can explore further guidance.
Key Takeaways
- Drain the fresh water tank completely and disconnect city water before starting sanitation to prevent contamination and damage.
- Mix 1/4 cup unscented bleach per 15 gallons of potable water in a separate container before adding to the tank.
- Fill the tank with the diluted bleach solution and circulate it through all faucets, showers, and toilet lines using the water pump.
- Let the bleach solution sit for at least 4 hours, up to 12 hours for thorough disinfection depending on temperature and contamination.
- After contact time, flush all water lines repeatedly until no chlorine odor remains to remove residual bleach and protect plumbing.
Prepare Your RV Water System for Sanitizing

Before you begin sanitizing your RV water system, make sure to turn off the water pump and disconnect any city water connections.
Always turn off the water pump and disconnect city water before starting RV water system sanitation.
Next, drain the fresh water tank completely using the designated drain valve(s).
Inspect the tank for stale water or odors.
If water has been sitting for an extended period or smells off, a full drain is essential.
Always use a potable-water hose; avoid garden hoses to fill and flush the system to prevent contamination.
Confirm your tank’s capacity precisely before adding any sanitizer, as dosage depends on this volume.
These steps guarantee the system is properly prepared for effective sanitation, preventing dilution errors and reducing contamination risks during cleaning.
Proper preparation is vital for a thorough and safe sanitizing process.
Additionally, ensure all valves are fully closed and connections are leak-free to maintain system integrity during cleaning, as outlined in Preparation and Safety.
How to Calculate Bleach Dosage for Your RV Water System?
Calculate the exact amount of bleach you’ll need by first confirming your RV’s fresh water tank capacity. The standard dosage is 1/4 cup (2 ounces) of unscented household bleach per 15 gallons of tank volume.
For example, if your tank holds 30 gallons, you’ll require 1/2 cup of bleach. Avoid pouring undiluted bleach directly into the tank; instead, dilute it in a bucket of clean water before adding.
This guarantees even distribution and prevents material damage. Precise measurement is critical to avoid over- or under-sanitizing. Use a measuring cup for accuracy.
Stick to unscented bleach to prevent unwanted residues or odors. Knowing your tank’s volume and applying the correct bleach ratio allows effective sanitization while protecting your plumbing system.
It is important to flush and drain the system after sanitizing to remove any leftover bleach and ensure water safety.
How to Safely Mix and Add Bleach to Your RV Water Tank?
When it comes to mixing and adding bleach to your RV water tank, it’s really important to get the measurements just right. This way, you ensure effective sanitation without risking any damage to your tank. So, first things first—check your tank’s capacity and measure the bleach accordingly.
Now, here’s a crucial tip: always dilute the bleach in a separate container with some clean water before adding it to the tank. This helps prevent concentrated bleach from coming into direct contact with the tank surfaces, which could cause harm.
Once you’ve got your bleach diluted, use a funnel or hose to safely introduce that mixture through the gravity-fill port or freshwater inlet. This way, you’ll ensure that everything goes smoothly and your tank stays in good shape!
For best results, aim for a 50 PPM chlorine concentration in your disinfecting solution to effectively sanitize the tank without causing corrosion.
Measuring Bleach Correctly
Measure the bleach accurately to guarantee effective sanitation without damaging your RV’s water system.
Begin by confirming your fresh water tank’s capacity; this is vital for correct dosing.
The standard ratio is 1/4 cup (or 4 ounces) of unscented household bleach per 15 gallons of tank capacity.
Use a calibrated measuring cup for precision. Guessing can lead to under- or overdosing, risking ineffective cleaning or material damage.
Never add undiluted bleach directly into the tank. Instead, dilute the bleach in clean potable water within a separate container before introducing it to the tank.
This method ensures even distribution and protects the plumbing.
Introduce the diluted solution carefully via the gravity-fill port or freshwater inlet using a funnel or hose. Avoid spills and direct contact with tank surfaces.
For enhanced safety and environmental care, it is recommended to use non-toxic, biodegradable cleaning products when possible.
Proper Bleach Dilution
Although it might seem straightforward, diluting bleach properly before adding it to your RV water tank is essential to ensure effective sanitation without damaging your plumbing.
Undiluted bleach can corrode tank materials and fittings, so you must mix it correctly.
Follow these steps for safe and precise dilution:
- Measure the bleach based on your tank size—typically 1/4 cup per 15 gallons.
- Dilute the measured bleach in a separate container filled with clean potable water.
- Pour the diluted solution into the tank through the gravity-fill port or freshwater inlet.
This method ensures even distribution and prevents concentrated bleach from contacting sensitive components.
After adding the solution, fill the tank with potable water before circulating sanitizer through your water lines.
Always ensure to flush your RV system thoroughly after sanitizing to prevent contamination and protect your water quality.
Circulate Bleach Solution Through All Water Lines and Fixtures
Begin by filling the fresh water tank with the diluted bleach solution. Then activate the water pump to push the sanitizer through the system.
Open each faucet, both hot and cold sides, one at a time until you smell chlorine at every fixture. Don’t forget exterior showers and toilet flush lines; they must also receive the sanitizer to guarantee complete coverage.
This process forces the bleach solution through every branch of the plumbing system, not just the tank. Make sure you cycle the sanitizer through sinks, showers, toilets, and any external faucets.
For ongoing protection, consider installing an inline multi-stage water filter to reduce chlorine taste and odors while maintaining clean water lines.
How Long to Let the Bleach Solution Disinfect Your System?
When it comes to disinfecting your system with a bleach solution, you’ll want to let it sit for at least 4 hours. This should do the trick for effective disinfection. However, in some cases, you might need to let it sit for up to 12 hours.
Now, keep in mind that factors like water temperature and how contaminated your system is can really affect the contact time you’ll need. If you notice a strong chlorine smell at each fixture, that’s a good sign! It usually means that the sanitizer has circulated properly through the lines.
For long-lasting protection, consider applying a flexible waterproof sealant to any exterior gaps where water lines enter the RV to prevent contamination.
Recommended Contact Duration
When disinfecting your RV water system, allowing the bleach solution to remain in contact with the plumbing for an adequate duration is essential to guarantee effective sanitation.
Insufficient contact time reduces disinfection efficacy, while overly long exposure is unnecessary and can strain components.
Follow these guidelines to optimize contact duration:
- Let the bleach solution sit for a minimum of 4 hours, ensuring it thoroughly disinfects both the fresh water tank and plumbing lines.
- For enhanced sanitation, especially after extended storage or contamination concerns, extend contact time up to 12 hours.
- Keep the system filled during this period to maintain sanitizer coverage throughout the entire water system.
Adhering to these durations will maximize microbial kill while protecting your RV’s plumbing integrity. Using products with low odor formulas can also help minimize discomfort during the disinfection process.
Factors Affecting Disinfection
Although a standard contact time provides a baseline for disinfecting your RV water system, several factors influence how long the bleach solution must remain to guarantee effective sanitation.
The concentration of bleach, water temperature, and system complexity all affect disinfection duration. Higher bleach concentrations reduce required contact time, while lower temperatures slow sanitizer activity, necessitating longer exposure.
Complex plumbing with multiple branches or stagnant areas may require extended contact to assure full coverage. You should also consider manufacturer recommendations, as some systems specify precise durations based on materials and design.
Maintaining the system filled with the sanitizer solution during this period is essential to maximize contact with all surfaces.
Adjust your contact time accordingly to these variables to ensure thorough and reliable microbial elimination throughout your RV’s water lines. Additionally, regularly inspecting and maintaining your RV’s water system can help prevent contamination and ensure the longevity of your sanitation efforts.
Signs Sanitizer Is Effective
Frequently, a strong chlorine odor at your RV’s faucets and fixtures signals that the bleach solution has effectively circulated through the water lines. This indicates successful sanitizer coverage.
To guarantee the sanitizer works properly, you need to let the bleach solution sit in the system for an adequate contact time. Here’s what you should do:
- Allow the bleach solution to remain in the water tank and lines for at least 4 hours. Some recommend up to 12 hours for thorough disinfection.
- Keep the system filled during this period to maintain sanitizer contact with all plumbing surfaces.
- Confirm chlorine odor at every faucet, including hot and cold lines, showers, and toilets. This is an indicator the sanitizer reached all sections.
Following these steps guarantees effective microbial kill and system sanitation. Using breathable covers during winter can help protect the RV’s plumbing system from moisture-related damage.
Draining and Flushing Bleach Residue Effectively
After the sanitizer has sat in your RV’s water system for the recommended contact time, you’ll need to drain the fresh water tank completely to remove the bleach solution. Open the drain valve fully and allow all treated water to exit.
Next, run each faucet, shower, and toilet line individually until no strong chlorine odor remains. This ensures the sanitizer is flushed from every branch of your plumbing system.
Then, refill the tank with clean potable water and repeat the flushing process to clear residual bleach. Depending on your system, you might need multiple flush cycles to eliminate the bleach smell entirely.
This thorough draining and flushing process is essential to prevent lingering bleach taste and protect your plumbing components from prolonged chemical exposure.
Maintenance Tips for a Clean and Safe RV Water System
Once you’ve flushed out the bleach residue completely, maintaining your RV’s water system becomes key to preventing contamination and preserving water quality.
Proper maintenance after flushing bleach safeguards your RV water system’s cleanliness and water quality.
Regular upkeep guarantees safe drinking water and extends system life.
To maintain your system effectively:
- Inspect and Drain Frequently: Check for stale water or odors monthly. Drain the fresh water tank if water has been sitting or tastes off.
- Use Potable Hoses Only: Always fill and flush with potable water hoses to avoid introducing contaminants.
- Sanitize Periodically: Sanitize the entire system after storage or exposure to questionable water sources. Follow exact bleach dilution and contact time protocols.
Consistent adherence to these steps keeps your RV water system clean, safe, and reliable throughout your travels.
Avoid These Common Mistakes When Sanitizing Your RV Water Lines
When sanitizing your RV water lines, overlooking key steps can compromise the effectiveness of the process and your water quality.
Avoid these common mistakes: using undiluted bleach, neglecting to circulate sanitizer through all faucets, and failing to flush thoroughly afterward. Each error can leave bacteria or harmful residues.
| Mistake | Consequence | How You Feel |
|---|---|---|
| Undiluted bleach | Damage to tank lines | Frustrated, worried |
| Incomplete circulation | Incomplete sanitizing | Uneasy, unsafe |
| Insufficient flushing | Persistent bleach odor | Annoyed, hesitant |
Follow precise bleach dosage, circulate sanitizer fully, and flush thoroughly to ensure safe, clean water lines every time.
Frequently Asked Questions
Can I Use Bleach Alternatives Like Vinegar for RV Water Sanitation?
You can use vinegar as an alternative, but it’s less effective than bleach for sanitizing your RV water system.
Bleach is the most consistently documented and reliable sanitizer, killing a broader range of bacteria and viruses.
If you choose vinegar, expect a milder disinfection and possibly longer contact times.
Always prioritize manufacturer guidelines and make certain thorough flushing afterward to avoid taste or odor issues, regardless of which sanitizer you use.
How Often Should I Sanitize My RV Water System During the Camping Season?
You should refresh your RV water system’s vitality at least once every two to three weeks during the camping season.
If you notice any off-taste, odor, or after extended storage periods, sanitize immediately.
Regular maintenance prevents microbial buildup and keeps your water safe.
Always follow manufacturer guidelines, use proper bleach dosages, and flush thoroughly after treatment.
Staying on schedule guarantees crisp, clean water for your travels without unexpected complications.
What Type of Hose Is Safest for Filling and Flushing My RV Water Tank?
You should always use a potable-water hose when filling and flushing your RV water tank.
Unlike regular garden hoses, potable-water hoses are made of materials that won’t leach harmful chemicals or contaminants into your water supply.
They’re specifically designed for drinking water safety, reducing health risks.
Using these hoses guarantees your fresh water remains clean and safe during sanitation, preventing any contamination that might compromise your system’s hygiene.
Is It Safe to Drink Water Immediately After Flushing Out Bleach?
No, you shouldn’t drink water immediately after flushing out bleach. Even after draining the sanitizer, residual chlorine can linger in your system.
You need to flush the fresh water tank and lines multiple times with clean potable water until the bleach smell fades markedly or disappears.
This guarantees that any harmful bleach residue is removed, making the water safe for consumption and preventing potential health risks.
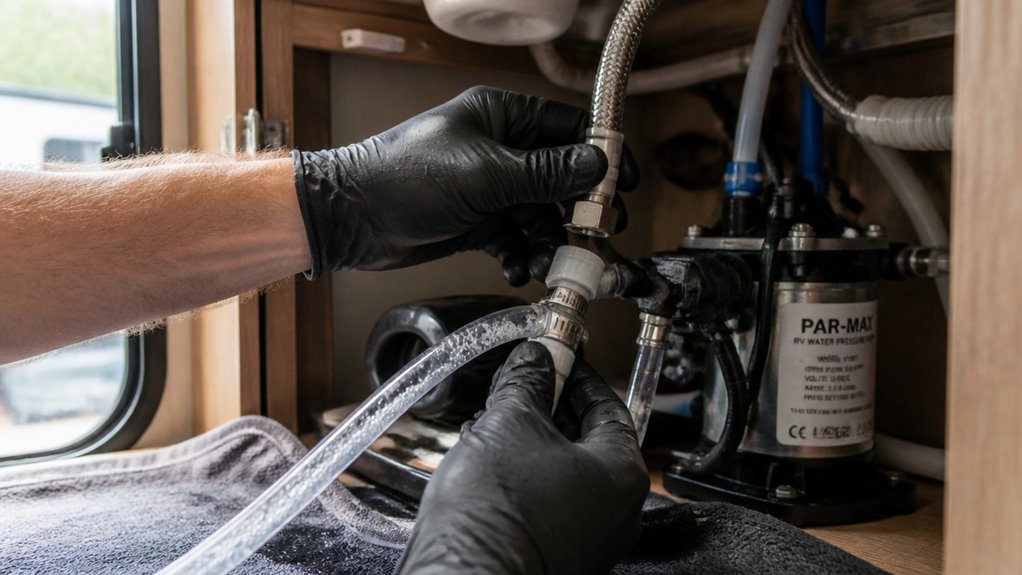
How Do I Know if My Water Pump Needs Maintenance During Sanitizing?
Think of your water pump as the heart of your RV’s hydration system. If it stutters or weakens, problems arise.
During sanitizing, listen for unusual noises, check if pressure drops when running the pump, or notice inconsistent water flow at faucets. These signs indicate wear or blockages.
If you spot any, inspect and service the pump promptly to maintain peak performance and guarantee effective sanitizer circulation throughout your plumbing lines.
Stay Ahead Of Odors, Buildup, And Contamination
Regularly sanitizing your RV water lines is essential. Did you know that up to 60% of RV water systems harbor bacteria if left untreated?
By following precise steps like calculating bleach dosage accurately and thoroughly flushing your system, you guarantee safe, clean water every time.
Stay diligent with maintenance and avoid common mistakes to protect your health and keep your RV water system functioning at peak performance on every trip.