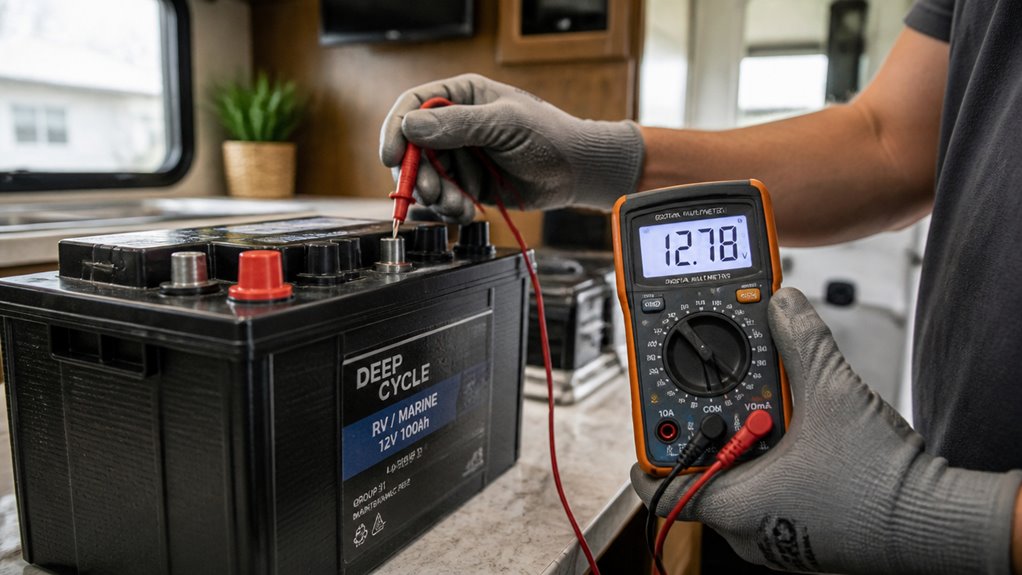
To test your RV battery, first disconnect all power sources and wear protective gear. Let the battery rest for several hours, then measure resting voltage with a multimeter.
12.6 volts or higher means fully charged. Next, perform a load test to check capacity, watching for voltage drops under load.
For flooded batteries, measure each cell’s specific gravity with a hydrometer to find weak cells. Following these steps guarantees accurate health assessment and helps you understand your battery’s condition more thoroughly.
Key Takeaways
- Disconnect all power sources and wear protective gear before testing to ensure safety and prevent accidents.
- Visually inspect the battery for corrosion, damage, and secure caps before proceeding with tests.
- Measure resting voltage with a multimeter after the battery rests for several hours without load.
- Interpret voltage readings: around 12.6V is full charge; below 12.0V suggests aging or sulfation.
- Perform a load test and check specific gravity in flooded cells to assess battery capacity and health.
Safely Prepare Your RV Battery for Testing

Before you begin testing your RV battery, make sure all power sources are completely turned off and disconnected, including shore power and any solar panels.
Ensure all power sources, including shore power and solar panels, are fully disconnected before testing your RV battery.
If solar panels are present, cover them or test at night to prevent charging from skewing results.
Next, conduct a thorough visual inspection: check for corrosion on terminals, loose or damaged cables, swelling, cracks, or electrolyte leaks.
Wear gloves and eye protection to prevent injury from acid exposure.
Confirm the battery compartment is well-ventilated and free from ignition sources to avoid hazardous conditions.
Only after these safety measures and inspections should you proceed with testing.
Using insulated tools when handling battery terminals will help prevent accidental sparks or short circuits during the process.
This methodical preparation guarantees accurate readings and protects both you and the battery from potential harm during the diagnostic process.
Check RV Battery Resting Voltage to Assess Health
You should always let your RV battery rest for several hours without any load before measuring its voltage to guarantee an accurate reading. This resting period minimizes surface charge effects, providing a true open-circuit voltage.
Set your digital multimeter to DC volts, then carefully connect the red probe to the positive terminal and the black probe to the negative terminal. Make certain all power sources are disconnected, and the battery is isolated from any load during measurement.
Record the resting voltage precisely, as it serves as a key indicator of the battery’s state of charge and overall health. Consistently following this methodical approach assures reliable data, allowing you to evaluate battery performance objectively before proceeding to voltage interpretation or further testing steps.
For best results, monitor the battery’s resting voltage regularly to avoid deep discharges that can significantly reduce its lifespan.
Interpret RV Battery Voltage Readings Accurately
Three key voltage levels help you accurately interpret an RV battery’s state of charge and health. A resting voltage of about 12.6 volts or higher indicates a fully charged lead-acid battery.
Voltage near 12.4 volts signals a partial charge, while readings around 12.2 volts or lower reveal significant discharge. If the voltage falls below 12.0 volts after charging, it suggests possible sulfation or battery aging.
Always compare your voltage readings with the battery manufacturer’s specifications, as chemistries may vary. To guarantee accuracy, measure voltage only after the battery has rested for several hours, eliminating surface charge effects.
This precise voltage interpretation guides your decisions on charging or replacement, preventing misdiagnosis and prolonging battery life. Additionally, maintaining proper ventilation during charging is important to safely manage any hydrogen gas produced by AGM batteries.
Perform a Load Test to Evaluate RV Battery Strength
Evaluate your RV battery’s true capacity by performing a load test, which simulates the demands placed on it during use. First, make sure all unnecessary loads are disconnected and safety precautions are in place.
Assess your RV battery’s capacity by performing a load test with safety measures and minimal connected loads.
Use a battery load tester or run specific RV accessories to apply a controlled load. While the load is applied, monitor the battery voltage closely using a multimeter.
A healthy battery should maintain voltage above a threshold specified by the manufacturer for the test duration, usually 10-15 seconds. If the voltage drops rapidly or falls below this threshold, the battery’s capacity is compromised, indicating internal damage or weakening cells.
Conclude the test promptly to avoid over-discharging. Document the voltage response to inform battery maintenance or replacement decisions. Regular monitoring and avoiding discharges below 12 volts can help extend battery life and prevent premature failure.
Test Specific Gravity to Diagnose Flooded RV Batteries
Testing the specific gravity of each cell in a flooded lead-acid RV battery provides critical insight into electrolyte condition and cell health.
First, make certain the battery is disconnected from all power sources and wear proper protective gear.
Remove each cell’s cap carefully to avoid electrolyte splashes. Use a hydrometer to draw electrolyte from each cell, then note the specific gravity reading on the float scale.
Compare these values across cells. Consistent readings indicate balanced, healthy cells, while significant variations suggest weak or failing cells.
Specific gravity below the manufacturer’s recommended range points to undercharge or sulfation.
Only add distilled water if levels are low; never overfill.
This test helps identify charging issues and cell degradation, guiding maintenance or replacement decisions effectively.
Proper protective gear is essential to guard against potential splashes or fumes during battery testing and maintenance.
Frequently Asked Questions
How Often Should I Test My RV Battery for Maintenance?
You should test your RV battery at least every three months to maintain peak performance. After heavy use or long storage periods, test even more frequently.
Regular checks help you catch issues like sulfation or capacity loss early. Always perform resting-voltage tests and, if possible, load or specific-gravity tests for flooded batteries.
Consistent maintenance guarantees reliability and extends battery life, preventing unexpected failures during your trips.
Can Extreme Weather Affect RV Battery Performance?
Of course, your RV battery just loves extreme weather. It thrives on freezing cold or scorching heat, right? Actually, extreme temperatures markedly affect battery performance.
Cold reduces chemical reactions, lowering capacity and voltage. Heat accelerates aging and electrolyte loss. You should monitor voltage and specific gravity carefully during such conditions.
Ensure proper ventilation and timely maintenance. Taking methodical steps helps you avoid sudden battery failure when you least expect it.
What Tools Do I Need Besides a Multimeter and Hydrometer?
Besides a multimeter and hydrometer, you’ll need a battery load tester for evaluating voltage under load.
Gloves and eye protection are essential for safety when handling batteries and electrolyte.
A wrench or socket set helps disconnect terminals safely.
You might also want distilled water for topping off flooded batteries.
Finally, having a voltmeter with temperature compensation or a charger tester can assist in diagnosing charging system issues accurately.
How Do I Safely Dispose of an Old RV Battery?
You should never throw an old RV battery in the trash. Instead, take it to a certified recycling center or hazardous waste facility.
Before transport, wear gloves and protect yourself from acid leaks by sealing the battery in a sturdy plastic bag or container.
Many auto parts stores or battery retailers accept used batteries for recycling.
Proper disposal prevents environmental harm and complies with local regulations concerning lead-acid battery waste.
Can Solar Panels Damage My RV Battery if Not Disconnected?
Yes, solar panels can damage your RV battery if not disconnected during testing or maintenance.
They continue charging, which may cause inaccurate voltage readings and surface charge buildup, leading to misdiagnosis.
Additionally, improper load testing while panels are connected can cause overcharging or stress on the battery.
To avoid damage and guarantee accurate testing, disconnect your solar panels or cover them to stop power input before working on your battery.
Spot Weak Battery Cells Before They Leave You Stranded
By following these steps, you’ll make sure your RV battery’s health is crystal clear, like a lighthouse cutting through the darkest storm.
Safely preparing your battery, checking resting voltage, and interpreting readings accurately are essential first moves. Performing a load test and measuring specific gravity give you a detailed picture of its strength and condition.
With this methodical approach, you’ll avoid unexpected failures and keep your RV powered confidently on every adventure.