

To disconnect your RV battery, first locate it, usually in exterior compartments or under the hood. Identify if you have a manual disconnect or battery switch.
Power off all electrical systems and unplug shore power. Wear insulated gloves and use appropriate tools.
Always remove the negative (−) cable first, then the positive (+), keeping cables clear of metal. If equipped, turn the disconnect switch off to isolate power safely.
Follow these steps to protect your battery and extend its life. Further details cover maintenance and troubleshooting.
Key Takeaways
- Ensure all electrical components are off and wear insulated gloves and safety glasses before starting battery disconnection.
- Locate the battery and identify the positive (+) and negative (−) terminals and any disconnect switch before disconnecting.
- Always disconnect the negative (−) cable first, then the positive (+) cable, to safely break the electrical circuit.
- Use insulated tools to loosen terminals and prevent sparks, keeping cables separated from metal surfaces during disconnection.
- Cover exposed terminals with plastic caps or tape after removal, and reconnect by attaching positive (+) cable first, then negative (−).
Locate Your RV Battery and Disconnect Options

To begin, track down your RV battery by checking common locations such as exterior compartments or under the hood.
Some models may also place the battery in storage bays or near the front of the camper.
Identify whether your RV uses a manual cable connection or a battery disconnect switch.
The disconnect switch, often installed inline with the battery cable, may be located in a storage bay, stairwell, or close to the battery itself.
Switching it off interrupts power flow without physically removing cables, simplifying isolation.
If your RV lacks this switch, prepare to manually disconnect the battery cables.
Knowing your battery’s exact location and disconnect method beforehand secures a smoother, safer disconnection process.
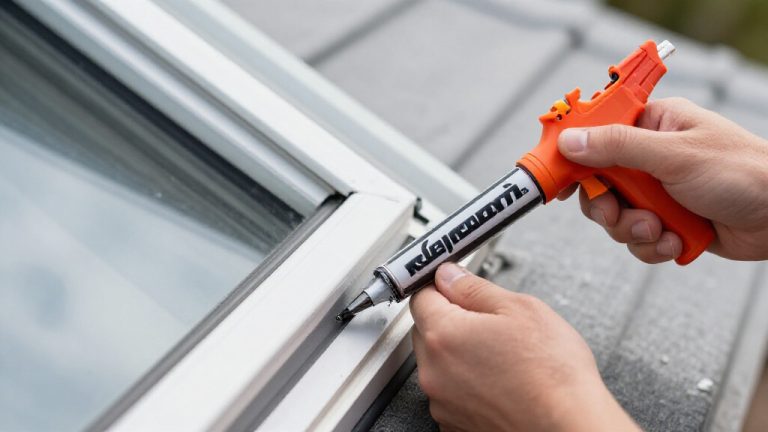
For added safety during disconnection, using sensor-safe, non-corrosive sealants on electrical connections can help protect against corrosion and ensure reliable operation.
Prepare Safely Before Disconnecting Your Battery
Before disconnecting your RV battery, make sure all electrical components are powered off. The vehicle should be unplugged from shore power or any external source.
Ensure all electrical devices are off and disconnect from shore power before removing your RV battery.
Wear insulated gloves and safety glasses to protect against acid exposure and sparks. Use only insulated tools when loosening terminal connections to prevent accidental short circuits.
Keep metal tools away from both terminals simultaneously to avoid sparks or damage. Locate your battery in the exterior compartment or under the hood to ensure you have clear access.
Confirm the battery disconnect switch is off if your RV has one, but don’t operate it yet—that’s for the next step. These precautions reduce risk and ensure you disconnect the battery safely without damaging your RV’s electrical system or injuring yourself.
AGM batteries are maintenance-free and require less handling, which adds an extra layer of safety during disconnection.
Use an RV Battery Disconnect Switch Correctly
To use your RV battery disconnect switch effectively, just remember to turn it off when you want to safely isolate the battery from the RV’s electrical system. It’s really that simple!
Make sure the switch is installed correctly—ideally, it should sit in line between the battery and the RV cables. This way, you can quickly cut off power without the hassle of removing any terminals.
Using the disconnect switch is a smart move, especially during storage, as it helps reduce battery drain. Plus, it makes your maintenance tasks a whole lot easier!
For optimal battery health during storage, consider using a charger with float charging mode to preserve battery readiness over long periods.
Switch Operation Basics
Frequently, RV owners rely on a battery disconnect switch to safely isolate the battery without physically removing cables. You simply turn the switch to the OFF position, which opens the circuit and halts power flow to your RV’s electrical system. This method reduces wear on terminals and prevents battery drain during storage.
To use the switch correctly:
Always switch to OFF before working on any electrical components.
Confirm the switch is in ON position to restore power after maintenance.
Avoid toggling the switch rapidly to prevent electrical arcing.
For long-term protection, using a weather-resistant sealant around electrical terminals can help prevent corrosion and moisture damage.
Installation and Benefits
Operating an RV battery disconnect switch safely depends on proper installation.
Install the switch inline between the battery’s positive cable and the RV’s electrical system to guarantee full isolation when off.
Securely mount the switch in an accessible location near the battery or inside a storage compartment.
Use appropriately rated wiring and connectors to handle your RV’s current load without overheating.
Tighten all connections firmly but avoid overtightening to prevent damage.
Proper installation prevents accidental battery drain, enhances safety during maintenance, and simplifies power disconnection without tool use.
By using the switch correctly, you reduce corrosion risk at terminals and protect against electrical shorts.
Always verify that the switch fully opens and closes the circuit, guaranteeing reliable power control for your RV’s appliances and systems.
For enhanced safety, consider integrating a circuit analyzer to detect wiring issues before connecting the electrical system.
Manually Disconnect Your RV Battery
To start, loosen and remove the negative (-) cable first. This is really important because it safely breaks the circuit. Just make sure to keep that cable away from any metal surfaces—no one wants accidental contact!
Once that’s done, you can move on to the positive (+) cable. Just a quick heads-up: be careful not to let it touch the negative terminal or the RV frame. That little detail can save you from some headaches later on!
For best results, always ensure your battery’s built-in BMS protection is functioning properly before disconnecting to avoid any electrical risks.
Negative Cable Removal
Always begin by disconnecting the negative (-) cable first to safely break the circuit and prevent electrical shorts. Start by turning off all RV electrical components and disconnecting shore power.
Use insulated tools and wear gloves and safety glasses to protect yourself. Loosen the negative terminal nut with a wrench or socket set, then carefully remove the cable.
Once removed, move the negative cable away from metal surfaces to avoid accidental reconnection or sparking.
Keep these points in mind:
- Never let the negative terminal touch the RV frame or positive cable.
- Use insulated tools to reduce short-circuit risk.
- Store the disconnected cable safely, away from battery terminals.
Following these steps guarantees a safe, controlled disconnection before proceeding to the positive cable removal. Proper ventilation is also important when working with AGM batteries to prevent buildup of hydrogen gas during charging or maintenance.
Positive Cable Disconnection
Loosen the positive (+) terminal nut using a wrench or socket set once the negative cable is safely moved away from the battery. Use insulated tools to prevent accidental short circuits.
Carefully lift the positive cable off the terminal post without allowing it to touch any metal surface or the disconnected negative cable. Immediately move the positive cable away from the battery compartment and secure it to avoid accidental reconnection.
Avoid crossing the positive and negative cables or letting them contact the RV frame, as this can cause sparks or damage. After removal, inspect the terminal for corrosion or damage.
Cover the exposed positive terminal with a plastic cap or electrical tape to prevent accidental contact during storage or maintenance. This completes the manual disconnection of your RV battery’s positive cable safely.
Regular maintenance, including checking for corrosion, is essential to keep the battery and connections in optimal condition during storage or use in varying environmental conditions.
Store and Maintain Your Battery After Disconnection
Maintaining your RV battery properly after disconnection guarantees its longevity and reliable performance. Once disconnected, store the battery in a cool, dry place away from direct sunlight and extreme temperatures.
Before storage, clean the battery terminals and cover them with plastic caps or electrical tape to prevent corrosion and accidental contact. Check the electrolyte levels regularly if you have a flooded battery, topping off with distilled water as needed.
Follow these key maintenance steps: Label cables before disconnection to simplify future reconnection. Inspect the battery and cables for corrosion, cracks, or loose connections. Charge the battery periodically during extended storage to avoid deep discharge.
Proper storage and upkeep help preserve battery capacity and extend service life. Using a smart maintainer charger during long-term storage can significantly prevent capacity loss and sulfation.
Reconnect Your RV Battery Safely
Once your battery is properly stored and maintained, you can proceed to reconnect it to your RV electrical system.
Start by identifying the positive (+) and negative (-) terminals. Connect the positive (+) cable first, guaranteeing a secure but not overtightened fit.
Begin by locating the positive (+) and negative (-) terminals, connecting the positive cable securely but not too tight.
Next, attach the negative (-) cable, tightening it firmly. If your RV uses a battery disconnect switch, confirm it’s set to the “on” position to restore power.
Always use insulated tools to avoid sparks or shorts. Keep cables from touching each other or metal surfaces.
After reconnecting, test your RV’s lights and appliances to verify proper operation. This sequence guarantees safe power restoration while preventing damage or accidental shorts during reconnection.
For optimal performance in cold weather, consider using AGM batteries known for their reliability in extreme conditions.
Troubleshoot Common Battery Issues
When you run into battery issues, pinpointing the cause quickly helps prevent further damage or downtime. Start by inspecting the terminals for corrosion or loose connections, as these often cause poor contact or voltage drops.
Next, check the battery voltage with a multimeter to make certain it holds a proper charge. A reading below 12.4 volts indicates discharge or failure.
Finally, examine the cables for fraying or damage that could interrupt power flow.
Focus on these key checks:
- Corroded or loose terminals causing weak connections
- Battery voltage measurement below recommended levels
- Damaged or worn cables affecting current delivery
Prevent Battery Drain and Extend Battery Life
Identifying and addressing battery issues is only part of the process; preventing battery drain plays a pivotal role in extending your RV battery’s lifespan.
To minimize drain, always turn off all electrical components when not in use, and disconnect shore power during storage.
Use a battery disconnect switch to isolate the battery without removing cables physically. This effectively stops parasitic loads that slowly deplete charge.
Inspect and clean terminals regularly to guarantee solid connections, reducing resistance and heat buildup.
Avoid leaving lights, fans, or appliances running unattended.
For long-term storage, disconnect the battery entirely and store it in a cool, dry place.
Periodically charge the battery to prevent sulfation.
Implementing these practices preserves battery capacity, reduces premature failure, and guarantees reliable power availability when you hit the road again.
Frequently Asked Questions
Can I Disconnect the RV Battery While the Engine Is Running?
No, you shouldn’t disconnect the RV battery while the engine is running. Doing so can cause electrical surges that damage sensitive components and the alternator.
Always turn off the engine and all electrical systems before disconnecting the battery. This prevents sparks and short circuits, ensuring your safety and protecting your RV’s electrical system from harm.
Follow proper disconnection steps for safe battery handling.
How Often Should I Check the Battery Water Levels?
You should check your battery water levels at least once a month, especially during heavy usage or hot weather.
Maintaining proper water levels prevents sulfation and extends battery life. Always use distilled water, filling only to the recommended level indicated by the manufacturer.
Avoid overfilling, as it can cause acid overflow. Regular checks help you catch evaporation or leaks early, ensuring peak battery performance and safety.
What Type of Gloves Are Best for Battery Handling?
You don’t want to face a battery acid explosion that feels like a volcano erupting on your skin. That’s why you should use heavy-duty, acid-resistant gloves made of nitrile or rubber.
These gloves protect you from corrosive battery acid and accidental sparks. Avoid thin or cloth gloves. Always check for tears before use and wear gloves that fit snugly to maintain dexterity while handling terminals and cables safely.
Can a Solar Charger Keep the Battery Charged When Disconnected?
Yes, a solar charger can keep your battery charged even when disconnected from the RV’s electrical system, provided the charger is directly connected to the battery terminals.
If the battery is fully disconnected, with cables removed or a disconnect switch off, the solar charger won’t maintain charge unless wired separately.
Make sure your solar controller has a direct line to the battery to prevent discharge and maintain peak charge levels during storage or non-use.
How Do I Recycle an Old RV Battery Safely?
To recycle your old RV battery safely, first wear gloves and safety glasses to protect against acid exposure.
Transport the battery upright in a sturdy, leak-proof container.
Never dispose of it in regular trash.
Take it to a certified recycling center or automotive store that accepts lead-acid batteries.
They’ll handle proper disposal and recycling of hazardous materials, keeping you compliant with environmental regulations and ensuring safe battery processing.
Extend Battery Life By Disconnecting Your RV Battery Safely and Correctly
Now that you know how to disconnect your RV battery safely and correctly, you can prevent unnecessary drain and extend its lifespan.
Contrary to popular belief, disconnecting your battery doesn’t reset your RV’s electronics but does protect against power loss and corrosion.
By following these precise steps, whether using a disconnect switch or manual removal, you’ll maintain peak battery health and avoid common issues.
Always store your battery properly to guarantee reliable performance on your next trip.

[…] insulated tools when handling battery terminals will help prevent accidental sparks or short circuits during the […]