
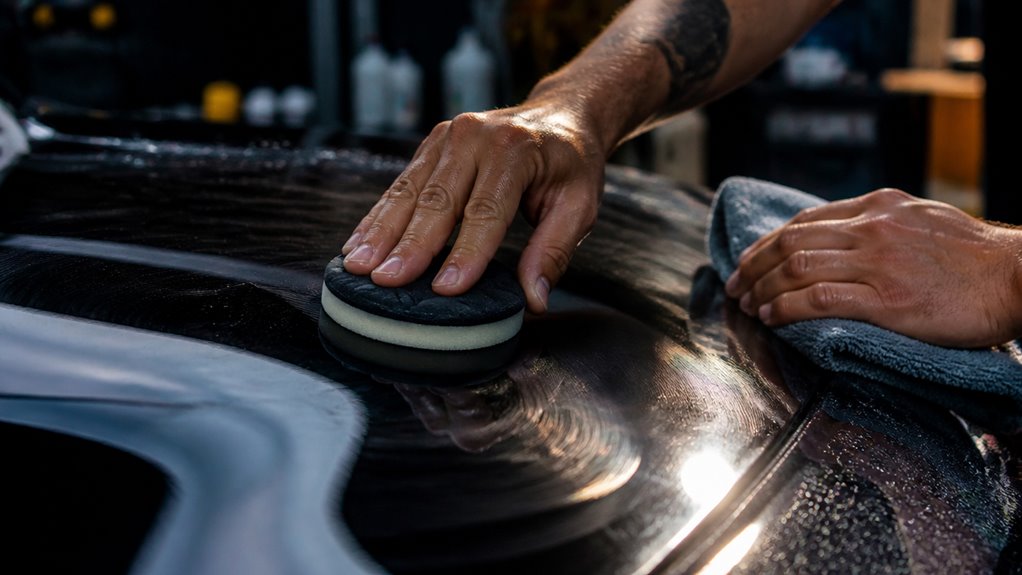
To hand polish your car, start by thoroughly washing and decontaminating the surface with a clay bar to remove bonded particles.
Choose a polish matching your paint’s condition: fine for light swirls, medium for moderate defects.
Apply polish in small sections using a foam or microfiber pad. Work with light to moderate, consistent pressure in straight or cross-hatch motions.
Remove residue promptly with clean microfiber towels.
Proper technique guarantees a flawless finish and paint protection. Explore further to master every step for peak results.
Key Takeaways
- Wash and dry the car thoroughly, using a clay bar if the paint feels rough to remove bonded contaminants before polishing.
- Work in small 2×2 foot sections, applying polish with a foam or microfiber pad using straight-line or cross-hatch motions.
- Use light to moderate pressure, keeping the applicator pad flat and maintaining consistent speed to avoid clear coat damage.
- Remove polish residue promptly with a clean microfiber towel using short, controlled strokes and flip the towel frequently.
- Re-polish only areas with persistent defects, then apply a protective wax or sealant in thin, even layers after polishing.
How to Prepare Your Car Surface for Hand Polishing?

Before you begin hand polishing, you need to prepare your car’s surface meticulously to guarantee effective and safe results.
Start by washing the vehicle thoroughly to remove dirt and grit, which can cause scratches during polishing.
Make sure the surface is cool and shaded to prevent premature product drying.
After washing, assess the paint texture; if it feels rough, use a clay bar with lubricant to decontaminate bonded particles.
Fully dry the car with clean microfiber towels, as moisture can interfere with product adhesion and clarity of defects.
Finally, inspect each panel carefully for swirls, scratches, oxidation, or residue.
This thorough preparation makes the polishing product perform at its best and minimizes the risk of surface damage during hand polishing.
Essential Tools and Materials for Hand Polishing Cars
To get started with hand polishing your car, you’ll want to gather some essential supplies. It’s important to choose a hand polish or swirl remover that suits the condition of your paint. This will really help you achieve the best results.
Next up, grab some foam or microfiber applicator pads. These will ensure that the product goes on evenly, which is key for that perfect finish.
And don’t forget about clean microfiber towels! You’ll need these for wiping away any residue and doing a final buff. They’re crucial for making sure your car looks flawless.
Oh, and before you start polishing, consider using cleaning accessories like clay bars with lubricant. This will help you remove any bonded contaminants on the surface, setting you up for a great polishing experience.
For optimal results, use high-quality microfiber towels to reduce the risk of scratching and enhance the paint’s depth and shine during polishing.
Necessary Polishing Supplies
Gathering the right tools and materials is essential for effective hand polishing and achieving a smooth, swirl-free finish. You’ll need supplies that guarantee even application, precise correction, and efficient residue removal. Focus on quality to protect your paint and maximize results.
Key polishing supplies include:
Hand polish or swirl remover tailored to your paint’s condition for targeted defect correction.
Foam or microfiber applicator pads that distribute product evenly without scratching.
Clean microfiber towels designed to remove polish residue and provide a streak-free buff.
Clay bar kit with lubricant to decontaminate surfaces before polishing, guaranteeing smoothness.
Equipping yourself with these essentials sets a solid foundation for your hand polishing process, enhancing both control and finish quality. Additionally, using a quick detailer spray with wax or polymer boosters between polishing sessions can help maintain protection and enhance gloss.
Cleaning Accessories Overview
Alongside the right polishing supplies, maintaining clean tools throughout the process is key to preventing scratches and achieving a flawless finish.
Use clean microfiber towels to remove residue and buff surfaces, folding them to expose fresh sides regularly.
Employ foam or microfiber applicator pads designed for even product application. Clean them frequently with a pad brush or compressed air to avoid dried product buildup.
A clay bar kit with lubricant is essential for decontaminating paint before polishing, ensuring a smooth surface free of bonded contaminants.
Keep multiple towels and applicators on hand to swap out as needed, preventing cross-contamination. Proper cleaning accessories minimize the risk of embedding grit into the paint.
This ensures your hand polishing yields peak clarity and gloss without introducing new defects.
Additionally, regularly inspecting and maintaining your car’s HVAC system can help reduce residue buildup that might affect interior surfaces during polishing.
How to Choose the Right Polish for Your Paint Condition?
When selecting a polish, consider the type and severity of the paint imperfections you need to address. Different polishes serve distinct purposes, from light swirl removal to heavy scratch correction. Match the polish abrasiveness to your car’s condition for effective, safe results.
Keep these points in mind:
- Light Swirls and Haze: Use a fine polish or swirl remover for minor imperfections.
- Moderate Scratches and Oxidation: Opt for a medium-cut polish to restore clarity.
- Heavy Defects: Choose a more abrasive compound but only if you have experience.
- Paint Sensitivity: Softer paints require less aggressive formulas to avoid damage.
Understanding your paint’s condition ensures you pick the right product, improving finish without unnecessary wear. Proper maintenance, similar to how regular care extends the lifespan of components like stainless steel casings, can help preserve your car’s paint finish longer.
How to Apply Polish by Hand, Step by Step?
Before you begin applying polish by hand, make certain your vehicle’s surface is clean, dry, and decontaminated to maximize product effectiveness.
Work in small sections, about 2×2 feet. Apply a small amount of polish to a foam or microfiber applicator pad for better control.
Use straight-line or cross-hatch motions, keeping the pad flat and applying light to moderate, consistent pressure.
Spread polish evenly before increasing pressure. Work the product into the paint for approximately 60 seconds or until it’s properly worked in, following product-specific haze and wipe-off instructions.
Afterward, use a clean microfiber towel folded into quarters to remove residue with short, controlled strokes.
Inspect the section immediately to confirm clarity before moving on. Clean your pad regularly to avoid buildup.
For best results, ensure the surface is free from contaminants like wax, grease, or silicone using an appropriate surface prep product before polishing.
Techniques to Remove Swirls and Scratches During Hand Polishing
To effectively remove swirls and scratches, start by using consistent polishing motions. You can choose straight lines or cross-hatches—whatever feels comfortable for you. Just remember to keep your pressure controlled and moderate.
Now, here’s a tip: work methodically in small sections. This way, you can really focus on each area without feeling overwhelmed. After polishing each section, take a moment to inspect it closely. This helps you identify any spots that might need a little extra work.
It’s important to maintain proper lubricity during polishing to prevent haze and protect the paint surface.
Effective Polishing Motions
Hand polishing effectively requires mastering the right motions to remove swirls and scratches without causing additional damage.
You should work in small, controlled areas to maintain focus and even coverage. Use consistent, deliberate passes to break down defects and polish the surface uniformly.
Vary your motion patterns to avoid creating new marks or uneven polish layers. Key polishing motions include:
Use overlapping straight-line or cross-hatch strokes to evenly distribute polish.
Apply light circular motions for stubborn swirls, but avoid excessive overlapping.
Keep the applicator pad flat against the surface to prevent edge marring.
Maintain a steady, moderate speed to ensure proper product breakdown and effective abrasion.
Mastering these motions will optimize defect removal and leave a smooth, swirl-free finish.
Controlled Pressure Application
Building on the polishing motions, controlling the amount of pressure you apply directly impacts how effectively swirls and scratches are removed.
Start with light to moderate pressure, allowing the polish to work without overloading the paint surface. Increase pressure gradually only if defects persist, but avoid excessive force that risks clear coat damage or uneven correction.
Maintain consistent pressure throughout each pass, keeping the applicator pad flat against the panel to guarantee even product distribution. Use your fingertips to sense resistance changes, adjusting pressure accordingly.
Focus higher pressure on stubborn swirls or scratches while reducing it when spreading polish or finishing. Controlled pressure maximizes abrasive action efficiency and minimizes paint stress.
This results in smoother, defect-free surfaces without compromising the finish’s integrity.
When working on coated surfaces, it is important to use fine-grade abrasives with gentle technique to prevent damage to the protective layer.
Inspecting and Reworking Areas
Once you’ve completed polishing a section, carefully inspect its surface for any remaining swirls or scratches under proper lighting conditions.
Use natural daylight or a bright LED lamp to reveal imperfections. If defects persist, rework the area with targeted hand polishing techniques to avoid over-polishing.
To effectively inspect and rework:
Use a clean microfiber towel to remove residue before evaluation.
Apply a small amount of polish on a fresh applicator pad for touch-ups.
Employ light, consistent pressure with overlapping strokes on defect zones.
Re-inspect frequently to prevent excessive material removal.
This methodical approach guarantees peak defect removal while preserving paint integrity.
It results in a flawless, swirl-free finish.
For optimal results, ensure your polishing technique considers surface compatibility to avoid damaging delicate finishes.
How to Remove Polish Residue for a Spotless Finish?
After working the polish thoroughly into the paint, removing the residue promptly with a clean microfiber towel guarantees a flawless finish.
Fold the towel into quarters to maximize clean wiping surfaces. Use short, controlled strokes to buff away haze and polish remnants, flipping the towel frequently to prevent reapplying residue.
Avoid circular motions; instead, follow straight or overlapping passes to minimize streaks. Inspect the panel immediately after wiping to confirm all polish has been removed and the surface is clear.
For best results, use multiple towels throughout the vehicle to maintain clean contact points. Proper residue removal not only reveals the true gloss but also prevents dust attraction and secures a smooth base for any subsequent protective coatings.
Using tools with optimized footprint shapes ensures more uniform polishing and reduces the risk of uneven wear on the paint surface.
When and How to Repeat Polishing for Better Paint Correction?
Although a single polishing pass can markedly improve your car’s finish, repeating the process on areas with persistent defects guarantees better correction and a more uniform gloss.
After your initial polish and residue removal, inspect the surface closely under good lighting. If swirls, scratches, or oxidation remain, focus on those spots with a second polishing pass.
Use consistent, moderate pressure and apply product sparingly to avoid overworking the paint. Follow these guidelines for effective repeat polishing:
Target only areas showing imperfections to save time and product.
Clean or replace your applicator pad to prevent contamination.
Work in small sections with controlled, overlapping strokes.
Remove residue thoroughly after each pass for accurate inspection.
For maintaining the finish after polishing, consider applying a ceramic coating to enhance durability and gloss while protecting against contaminants.
How to Protect Your Paint After Hand Polishing?
To maintain the enhanced finish achieved through hand polishing, you’ll need to apply a protective layer that shields the paint from environmental contaminants and UV damage.
Start by selecting a suitable product: wax, paint sealant, or ceramic coating based on your desired durability and finish.
Apply the protection in thin, even layers using a clean microfiber applicator.
Work in small sections for best results.
Allow adequate curing time as specified by the product instructions to guarantee optimal bonding.
After curing, buff gently with a clean microfiber towel to remove excess residue and enhance gloss.
Regularly reapply protection every few months, depending on exposure and product type, to sustain paint integrity.
Proper protection markedly reduces oxidation, fading, and contamination buildup following hand polishing.
Frequently Asked Questions
Can Hand Polishing Cause Damage to My Car’s Clear Coat?
Yes, hand polishing can damage your car’s clear coat if you apply excessive pressure or use abrasive products improperly.
To avoid this, use light to moderate pressure, choose a polish suited for your paint condition, and follow product instructions carefully.
Work in small sections with clean microfiber towels and applicator pads.
Overworking a spot or using dirty tools can cause scratches or uneven correction, so maintain clean contact surfaces throughout the process.
How Often Should I Hand Polish My Car for Maintenance?
How often should you hand polish your car for maintenance?
Typically, every 3 to 6 months is ideal, depending on your car’s exposure to environmental elements and driving conditions.
Over-polishing risks wearing down the clear coat, so you want to balance protection with preservation.
Regular washing and applying a protective layer after polishing will extend intervals.
Monitor your paint’s condition carefully to adjust frequency and maintain peak gloss without causing damage.
Is Hand Polishing Effective on All Car Paint Types and Colors?
Hand polishing works effectively on most car paint types and colors, but results vary.
Softer, single-stage paints respond well, while harder, clear-coated finishes require gentler products and techniques to avoid damage.
Dark and metallic colors reveal swirls and imperfections more readily, so polishing demands extra care.
You should always test a small area first, use suitable polish formulations, and adjust pressure to match your car’s specific paint characteristics for peak results.
Can I Hand Polish Over Existing Wax or Sealant?
Imagine trying to paint over a glossy, sealed canvas. You can, but it’s tricky.
Yes, you can hand polish over existing wax or sealant, but it’s best to remove them first.
Residue can block polish absorption, reducing effectiveness and causing uneven correction.
Use a dedicated wax and sealant remover or a mild polish to strip previous layers.
This ensures a clean surface for peak polishing results and better adhesion of new protection products.
What Should I Do if I Notice Uneven Shine After Hand Polishing?
If you notice uneven shine after hand polishing, immediately inspect the affected area for residue or incomplete polishing.
Use a clean microfiber towel to buff out any leftover product with light, controlled strokes.
If unevenness persists, reapply polish in thin, even layers using consistent pressure and overlapping passes.
Avoid excessive product or pressure.
Finally, make certain your applicator pads are clean to prevent contamination. Work in small sections for uniform results.
Protect and Preserve: How to Hand Polish Car and Maintain a Flawless Finish
By mastering hand polishing, you’re not just enhancing your car’s shine. You’re performing a paint correction miracle that would make professionals jealous.
With precise preparation, the right tools, and careful technique, you can erase swirls and scratches like a wizard of automotive perfection.
Remember, every step you take protects and revives your paint’s integrity. Hand polishing isn’t just maintenance; it’s an art form that transforms your car into a flawless masterpiece.


