
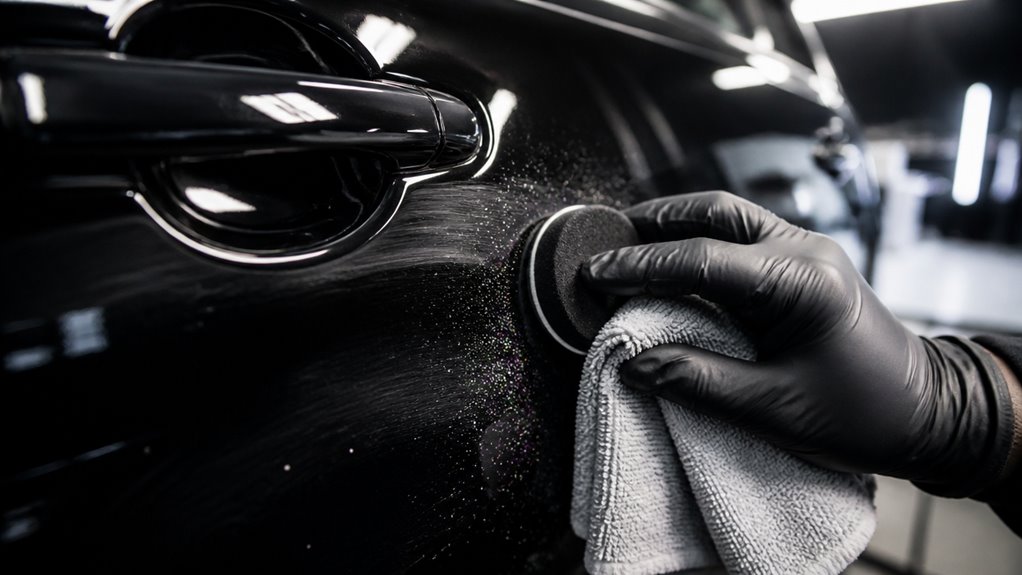
To remove micro scratches from your car, start by inspecting the surface under strong light to assess scratch depth.
Thoroughly wash using the two-bucket method and clay bar with proper lubricant to eliminate contaminants.
Select a fine polish or light compound suited for your clear coat and apply it with a soft foam pad using overlapping motions at moderate pressure.
Finish by wiping residue with a microfiber towel and applying wax or sealant for protection.
If scratches persist or catch your nail, professional repair may be necessary.
Learn how to refine each step for best results.
Key Takeaways
- Use strong sunlight or bright LED light to identify micro scratches accurately before treatment.
- Clay bar the surface with proper lubrication to remove bonded contaminants and prepare for polishing.
- Select a fine polish with minimal abrasives and apply with a dual-action polisher on low to medium speed.
- Work in small sections using overlapping, random patterns to evenly smooth micro scratches without creating new swirls.
- Avoid aggressive compounds on thin clear coats and test polish on inconspicuous areas before full application.
How to Identify Micro Scratches on Your Car Using Good Lighting?

When inspecting your car’s surface, use strong sunlight or a bright LED light to reveal micro scratches and swirl marks clearly. These fine imperfections become much easier to detect under good lighting conditions.
Begin by thoroughly cleaning and drying the panel to eliminate dirt that can obscure defects or cause additional scratching. Use the fingernail test to differentiate between light micro scratches and deeper damage. If your nail catches, the scratch likely penetrates beyond the clear coat and requires more intensive repair.
Focus your inspection on the clear coat layer, where micro scratches typically reside and can be improved by polishing. Avoid relying on dim or indirect lighting, as it conceals swirl marks and fine scratches, making accurate surface assessment impossible.
Because pollen particles act like microscopic sandpaper, they can exacerbate micro scratches and swirl marks if not properly removed.
Preparing Your Car’s Surface for Scratch Removal Wash
Alright, let’s get started!
First things first, you want to give your car a good pre-rinse. This will help wash away any loose dirt and debris that might scratch the surface when you start washing.
Now, here’s a tip: use the two-bucket method. One bucket should have your clean wash solution, and the other should be for rinsing your wash mitt. This way, you keep your clean water separate from any grime, which helps avoid contamination.
By taking these simple steps, you’ll set yourself up for a much safer wash.
Plus, it’ll really enhance your results when you’re working on removing those pesky micro scratches!
Using a foam cannon during pre-wash can significantly reduce abrasion risk by loosening dirt and minimizing scrubbing.
Pre-Rinse Importance
Before you apply any cleaning products or tools, you’ll want to thoroughly pre-rinse your car’s surface to remove loose dirt and debris.
This step minimizes the risk of dragging abrasive particles across the clear coat, which can worsen micro scratches.
Use a gentle, high-pressure water stream to dislodge contaminants without forcing grit into the paint.
Focus on all painted panels, wheel wells, and undercarriage areas.
Make sure the surface is visibly free of loose dirt before proceeding.
Skipping pre-rinse increases the likelihood of introducing new swirl marks during washing or polishing.
Proper pre-rinsing creates a safer, cleaner foundation for subsequent washing, claying, and polishing steps.
Ultimately, this improves the effectiveness of your scratch removal process and preserves your car’s paint integrity.
Additionally, performing pre-rinsing in a shaded, cool area helps prevent soap and water from drying too quickly, reducing the risk of water spots and streaks.
Two-Bucket Washing
Using the two-bucket washing method markedly reduces the risk of reintroducing dirt and grit onto your car’s surface during cleaning.
Fill one bucket with soapy water and the other with clean rinse water. Dip a clean wash mitt into the soapy bucket to wash a section of the car, then rinse the mitt thoroughly in the rinse bucket.
This separation prevents abrasive particles from returning to the paint and causing new micro scratches. Always use a high-quality microfiber wash mitt to minimize surface agitation.
Work systematically, washing one panel at a time, and frequently change the rinse water to maintain cleanliness. After washing, dry the car using plush microfiber towels with gentle blotting or light gliding motions to avoid rubbing contaminants into the clear coat.
This preparation guarantees an ideal surface for subsequent scratch removal steps.
Use the Two-Bucket Wash Method to Protect Your Paint
Washing your car with the two-bucket method helps prevent micro scratches by minimizing the transfer of dirt and grit onto the paint surface.
You use one bucket filled with soapy water to wash and a second with clean water to rinse your wash mitt, avoiding reintroducing contaminants. This method reduces the chance of dragging abrasive particles across the clear coat, which causes fine scratches.
Follow these steps:
- Fill one bucket with a pH-neutral car shampoo solution.
- Use a separate bucket with clean water for rinsing the wash mitt.
- Submerge the mitt in rinse water before reloading soap.
- Wash in small sections, frequently rinsing your mitt.
- Dry with a plush microfiber towel using gentle blotting or light gliding.
This approach preserves your paint’s integrity and prepares it for polishing or further correction. Additionally, using cleaning products with UV protection can enhance the paint’s resistance to environmental damage during washing.
How to Clay Bar Your Car to Remove Paint Surface Gunk?
To effectively remove those pesky bonded contaminants from your car’s clear coat, grab a clay bar and some proper lubrication. This combo is key to minimizing friction and preventing any extra marring on your paint.
When you’re ready to start, just work the clay gently over small sections of your car. Remember to knead it frequently; this helps expose a clean surface and ensures you’re really getting all the gunk off.
Once you’re done claying a section, wipe it down to check that it feels smooth and free of any debris. This step is important before moving on to the next part of your detailing process! Be sure to apply clay lubricant generously to maintain smooth gliding and protect your paint during the process.
Clay Bar Benefits
Removing bonded contaminants from your car’s clear coat is essential before polishing or scratch removal. Using a clay bar effectively lifts embedded particles like tar, rail dust, and industrial fallout that washing alone can’t remove.
This guarantees a smooth surface, improving polish adherence and reducing the risk of further scratching.
When you clay bar your car, you’ll benefit from:
- Eliminating rough texture caused by bonded contaminants
- Enhancing paint clarity and gloss by prepping the surface
- Reducing micro scratches by preventing abrasive particles during polishing
- Improving the effectiveness of subsequent polishing and waxing
- Providing a clean base to accurately assess paint defects
It is important to use fine-grade clay bars with ample lubrication and gentle technique to minimize the risk of damaging the coating.
Proper Lubrication Use
Apply a generous amount of lubricant to the panel before using the clay bar to minimize friction and prevent additional surface marring.
Spray the lubricant evenly on a small section, guaranteeing full coverage where the clay will glide.
The lubricant acts as a barrier, allowing the clay to move smoothly over contaminants without dragging or scratching the clear coat.
Avoid skimping on lubricant, as insufficient lubrication increases friction, risking new micro scratches.
Reapply lubricant frequently during the process, especially if the area begins to feel tacky or dry.
Maintain a wet surface until claying is complete to preserve the protective film.
Proper lubrication guarantees effective removal of bonded surface gunk while safeguarding the paint’s integrity throughout the decontamination stage.
Using proper water flow and detergents during cleaning helps reduce abrasion and protects the clear coat from damage.
Technique And Maintenance
You’ll want to work methodically, section by section, guaranteeing the lubricant fully covers each area before gently gliding the clay bar across the surface. This minimizes friction and prevents additional marring.
Knead the clay frequently to expose a clean side, maintaining its effectiveness. After claying, wipe the panel with a microfiber towel to check for remaining contaminants or true scratches. Proper technique and maintenance guarantee a smooth, clean surface ready for polishing.
Use a dedicated clay lubricant to reduce friction. Work in 2’x2’ sections for thorough coverage. Apply light pressure; avoid forcing the clay. Knead clay often to reveal a fresh surface. Wipe and inspect after each section before proceeding.
For best results, ensure your microfiber towels are clean and free from debris to prevent fabric wear during the process.
Pick the Best Polish or Compound for Your Micro Scratches
Select a polish or compound that matches the severity of your micro scratches to achieve ideal correction without damaging the clear coat.
For light micro scratches, choose a fine polish with minimal abrasives to gently smooth the surface.
If scratches are slightly deeper but still confined to the clear coat, opt for a light compound with moderate abrasiveness to restore uniformity.
Avoid aggressive compounds on thin or aged clear coats to prevent premature thinning.
Always test the product on a small, inconspicuous area first.
Use clean application pads to evenly distribute the product, ensuring consistent contact.
Monitor your progress frequently to avoid over-polishing.
This targeted approach preserves your paint’s integrity while maximizing scratch removal effectiveness.
For optimal results, consider using products that are compatible with clear coat finishes to prevent damage during the polishing process.
How to Use a Dual-Action Polisher to Remove Swirls and Scratches?
Mastering the dual-action polisher technique requires understanding its motion and speed settings to effectively reduce swirls and micro scratches without damaging the clear coat.
Start by applying a small amount of polish to the pad. Use low to medium speeds initially to spread the product evenly.
Begin with a small polish amount and use low to medium speed to evenly distribute the product.
Work in small sections, moving the polisher in overlapping, random patterns to avoid creating new swirls. Apply moderate pressure, letting the machine do the work.
Frequently check progress under strong light to prevent over-polishing.
Make sure the surface is clean and dry before polishing. Use a soft foam pad suitable for fine polishing.
Maintain consistent pad-to-surface contact. Avoid staying too long in one spot to protect clear coat thickness.
Clean or replace pads regularly to maintain effectiveness.
For best results, select a dual-action polisher with random orbital motion to minimize swirl marks and surface damage.
When to Use Scratch Remover Products and Abrasives Safely?
Before you dive into using any scratch remover products, it’s really important to assess the depth of the scratch. A handy way to do this is by using the fingernail test in good lighting. This will help you figure out just how deep the scratch is.
Once you’ve got a clear idea of the damage level, you can select the right abrasives. It’s always best to start with the least aggressive option first. This way, you can avoid causing any damage to the clear coat.
When you’re ready to apply the scratch remover, make sure to follow the product instructions closely. This ensures that you’re correcting the scratch effectively without risking over-polishing.
Happy fixing!
Identifying Scratch Depth
Although many micro scratches can be improved with polishing, determining the depth of a scratch is crucial before deciding whether to use scratch remover products or abrasives. You need to assess if the damage is limited to the clear coat or extends deeper.
Use proper lighting and the fingernail test to distinguish scratch severity. Inspect the panel under bright sunlight or LED light for better visibility. Clean and dry the surface to avoid confusing dirt with scratches.
Run your fingernail gently across the scratch; if it catches, it’s deeper than the clear coat. Surface contaminants can mimic scratches, so consider claying before inspection.
Deep scratches that expose primer or metal require professional sanding and repainting. This approach makes certain you choose safe, effective corrective methods without causing further damage.
Choosing Appropriate Abrasives
Select abrasives carefully based on the scratch depth and paint condition to avoid unnecessary damage. For micro scratches confined to the clear coat, use fine polishes or dedicated scratch remover products that gently abrade without thinning the paint excessively.
Avoid household abrasives like toothpaste, as they lack precision and can cause uneven wear. If scratches are deeper but not through the base coat, very fine grit sandpapers (2000-5000 grit) applied cautiously may be necessary, but only if you’re confident in controlling pressure and motion.
Always make certain the surface is clean and dry before applying abrasives to prevent dragging contaminants. Use abrasives incrementally, checking progress frequently under good lighting to avoid overcorrection.
Proper abrasive selection and cautious use minimize risks and prepare the surface effectively for the next repair steps.
Applying Scratch Remover Correctly
Knowing when to apply scratch remover products versus abrasives depends largely on the scratch depth and paint condition. Use scratch removers for light micro scratches confined to the clear coat, where polishing alone can restore the surface.
Reserve abrasives for deeper scratches that require careful sanding before polishing. Always assess the paint with a fingernail test and proper lighting.
To apply scratch remover correctly:
- Clean and dry the area thoroughly to avoid embedding dirt.
- Use a soft applicator pad to apply a small amount of product.
- Work in small, overlapping circular motions for uniform coverage.
- Avoid excessive pressure to prevent clear coat thinning.
- Wipe off residue with a clean microfiber towel and inspect under bright light.
This method guarantees safe, effective micro scratch correction without causing further damage.
What to Do If Scratches Don’t Improve or Need Professional Help?
If your efforts to remove micro scratches don’t yield noticeable improvement, it’s crucial to recognize when professional intervention is necessary. Use the fingernail test: if your nail catches, the damage likely extends beyond the clear coat, requiring advanced repair.
Deep scratches often need sanding, primer, and repainting. Avoid excessive polishing that can thin the clear coat. Consult a professional if the scratch penetrates primer or metal or if the finish is unusual.
| Condition | Cause | Recommended Action |
|---|---|---|
| Nail catches on scratch | Deep scratch beyond clear coat | Professional sanding and repaint |
| Surface looks dull after polishing | Insufficient correction or deep damage | Advanced repair needed |
| Persistent marks under strong light | Damage not removable by polishing | Seek professional assessment |
Final Polishing, Wiping, and Inspection After Scratch Removal
Once you’ve completed the scratch removal process, perform a final polish to restore the gloss and blend the repaired area seamlessly with the surrounding paint.
After scratch removal, finish with a final polish to seamlessly restore gloss and blend the repair.
Use a clean, soft polishing pad and a fine polish compound suited for your paint type. After polishing, carefully wipe the surface with a clean microfiber towel to remove residue without causing new scratches.
Inspect the panel under strong, direct light to confirm the repair quality. Look for uniform shine and absence of swirl marks or haze.
Use overlapping motions during final polishing for an even finish. Apply light pressure to avoid clear coat thinning.
Choose lint-free microfiber towels for wiping. Inspect in sunlight or bright LED for best visibility.
Re-polish small areas if imperfections remain.
Applying Wax or Sealant to Protect Your Corrected Paint
After confirming the paint correction meets your standards, protect the surface by applying a wax or sealant. Choose a product compatible with your paint type.
Wax offers a natural shine and moderate protection, while sealants provide longer-lasting durability. Apply the product evenly with a clean, soft applicator pad in thin, circular motions, covering small sections at a time.
Allow the wax or sealant to haze according to the manufacturer’s instructions, typically 5 to 15 minutes. Then, buff off the residue using a plush microfiber towel, turning it frequently to avoid re-depositing removed product.
This protective layer reduces exposure to contaminants, UV rays, and minor abrasions, preserving your corrected paint. Reapply wax or sealant every few months to maintain peak protection and enhance gloss.
Frequently Asked Questions
How Often Should I Polish My Car to Prevent Micro Scratches?
You should polish your car every 3 to 6 months to prevent micro scratches effectively.
Regular polishing removes surface contaminants and light scratches, maintaining the clear coat’s smoothness.
Avoid over-polishing, as excessive abrasion can thin the clear coat and cause damage.
Always inspect the surface under good lighting before polishing.
Use gentle, controlled motions with appropriate polish and tools to preserve your paint’s integrity and appearance.
Can Micro Scratches Affect My Car’s Resale Value?
Think of micro scratches like tiny paper cuts on your hand.
They might seem minor but can cause discomfort and signal wear.
Yes, micro scratches can lower your car’s resale value by reducing its visual appeal and suggesting poor maintenance.
Buyers and appraisers often notice clear coat imperfections under bright light, interpreting them as neglect.
Maintaining a smooth, glossy surface through regular polishing and protection helps preserve value and attract better offers.
Are There Specific Polishes for Different Car Paint Types?
Yes, you’ll find polishes tailored to different paint types: metallic, solid, or clear coat finishes.
Choose a polish formulated for your car’s paint to avoid damage and optimize correction.
For example, clear coat polishes are gentler and designed to preserve the protective layer.
Solid paints might handle slightly more aggressive compounds.
Always check product labels and test on a small area first to guarantee compatibility and effectiveness.
How Long Does It Take for Polish to Fully Cure?
Polish typically takes about 24 to 48 hours to fully cure, depending on environmental factors like temperature and humidity.
After application, avoid washing or waxing your car for at least a day to let the polish harden properly.
You should keep the vehicle in a shaded, dry area during this time to optimize curing.
Following these steps guarantees the polish bonds well, providing durable protection and enhanced gloss.
Is It Safe to Remove Micro Scratches in Cold Weather?
You shouldn’t play the polishing game in cold weather. It’s like trying to spread butter straight from the fridge. Low temperatures thicken polish and slow drying, reducing effectiveness and risking uneven finish or streaks.
Work in a temperature-controlled environment between 60-75°F (15-24°C) for best results. If you must work cold, warm your products and car surface first and proceed cautiously to avoid damage or poor correction outcomes.
Maintain Your Shine: Ongoing Care After Removing Micro Scratches From Car
Micro scratches might seem minor, but studies show they can reduce your car’s resale value by up to 10%.
By following proper steps, including good lighting inspection, thorough washing, claying, and using the right polish, you can effectively restore your paint’s finish.
Remember to apply wax or sealant afterward to protect your work.
If scratches persist, don’t hesitate to seek professional help.
Staying diligent guarantees your car maintains its shine and value longer.


